Discovering knitting

If you read my last post and/or follow me on Instagram, you might have heard me mention that I've been trying my hand at knitting recently? Well, I thought I'd fill you in a little more about how I've discovered this new found love for the craft. 

I spend so much time staring at a computer screen or my phone, that it has actually caused me some problems with my eyes, so I really wanted to find an activity that would take me away from the screen and that was creative, and knitting kept popping up as a possible option. My mum is a fantastic knitter and has made lots of things for Ruby and also knits for charity, but one of my memories from my childhood is her trying to teach me, and me throwing a strop because I couldn't get it! So I've never really tried it again since then, so when We Are Knitters got in touch about collaborating, I had to admit my novice knitter status to them! Thankfully they didn't mind that I was a newbie, and it seemed like fate that it came along at the exact time when I was looking for a new hobby. 

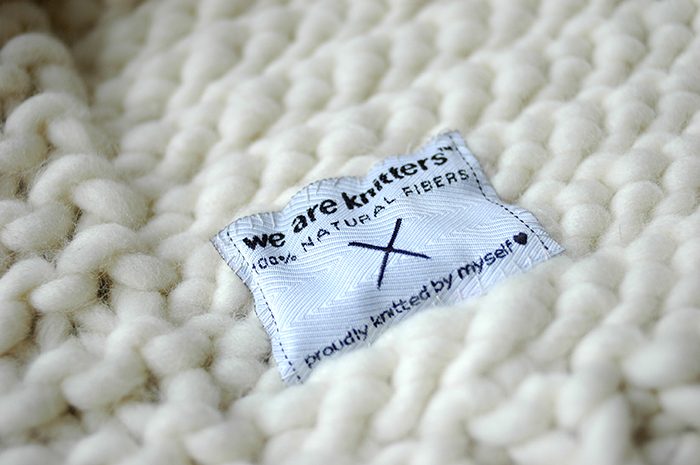
After perusing their fab range of knitting kits, I decided to go for the Nick Blanket kit. which is beginner level - that seemed like the best idea! This gorgeous package arrived shortly after, and as a packaging design geek, it certainly got me even more excited about my little project! Everything you need is inside - needles, yarn, instructions, sewing needle and a sweet little label to add to your finished item. 

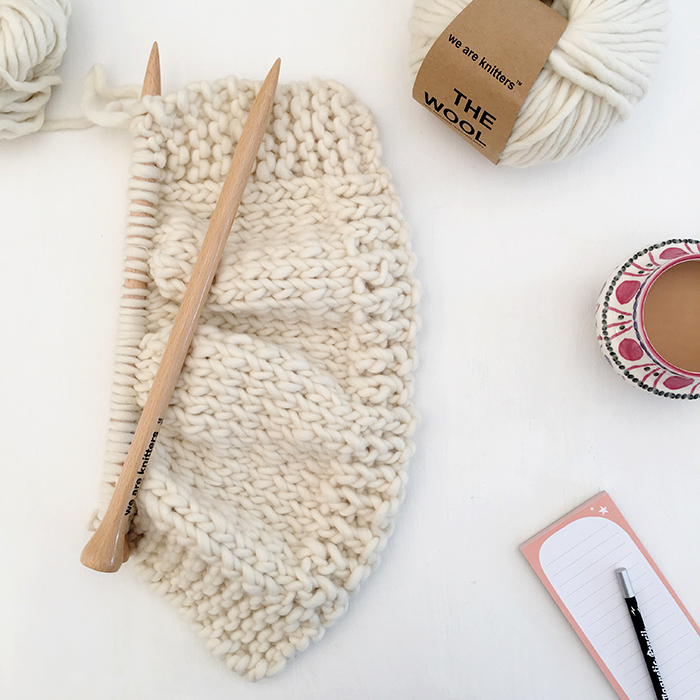
While the instructions for making the blanket are included, if you are a complete beginner like me, you will need to refer to the internet for how to actually knit! As in the different stitches and how to cast on and off. We Are Knitters have lots of tutorials or you can check out youtube, as there are often different ways of doing some things. I was pleasantly surprised at how quickly I picked up the stitches I needed for the blanket and after a few practice squares, I got cracking with the blanket. 

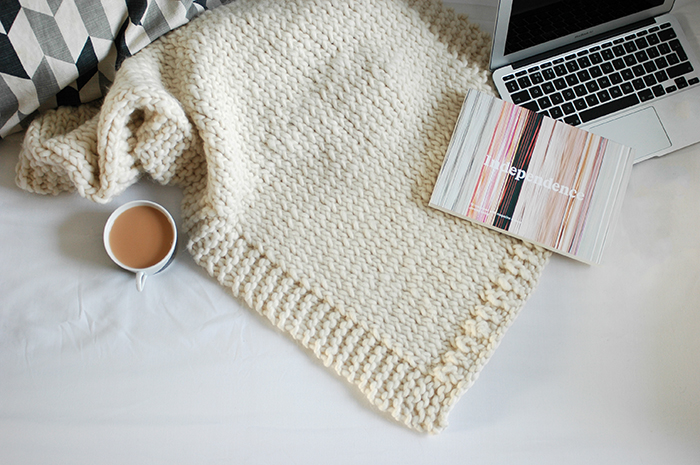
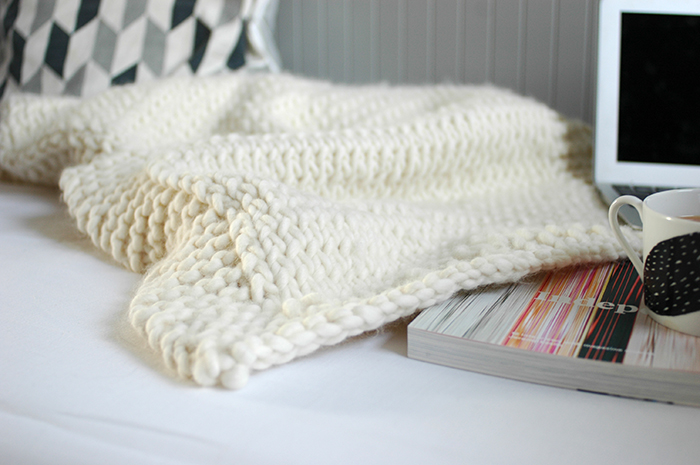
In the run up to Christmas my hubby had lots of parties and work commitments in the evenings, so I found myself curled up on the sofa completely immersed in the project and absolutely loving it! I managed to get it completed just before Christmas and I am so chuffed with it! 

Of course as a first attempt it is not perfect and I learnt a few things along the way (like don't leave your ends too short when you are adding a new ball of wool!) but overall it turned out pretty well. 

The finished blanket is not huge, but it would make a perfect baby blanket, or is big enough to drape over your legs on a chilly evening, or for adding texture to a chair or sofa, The wool is so gorgeous and chunky that it feels really snuggly and lovely. Ruby has already claimed it for herself and keeps lying on the floor with it! 

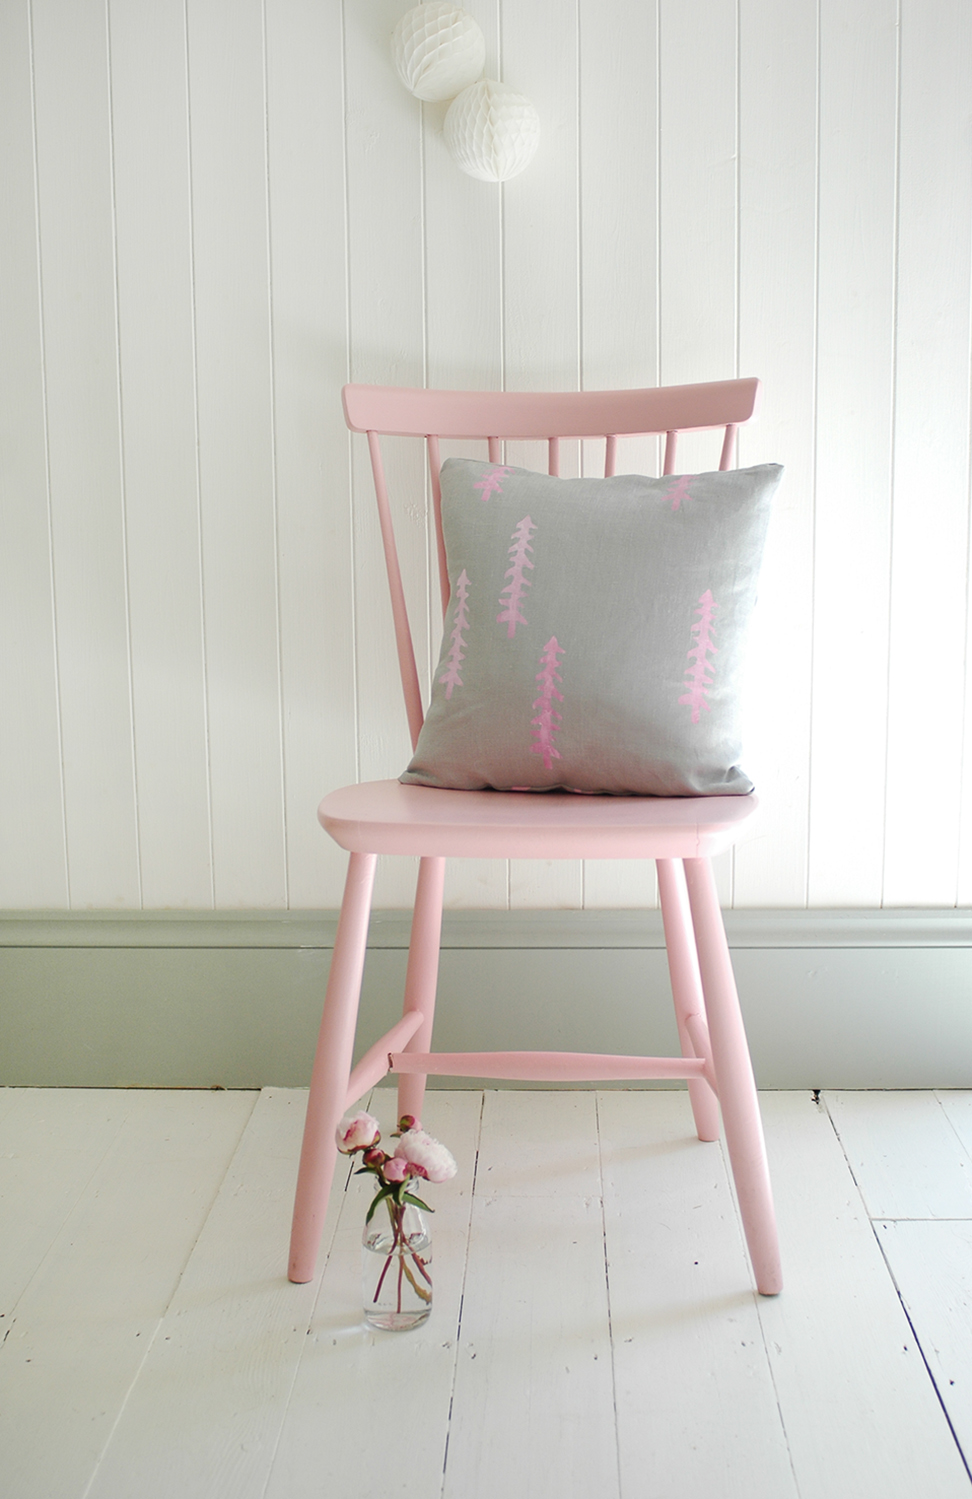
I've definitely got the knitting bug now and am looking for a new project. This cushion looks great, and I'd love to try the fabric yarn and We Are Knitters have so many gorgeous jumper patterns like this one I'd love to try once I'm a little more advanced! 

So, if you've got the urge for a new hobby this year, I can totally recommend it. And now is the perfect time as We Are Knitters have a sale on right now, so do have a peek at their website

*This post was written in collaboration with We Are Knitters, but all choices, opinions and knitting mistakes are my own!*

Photos: Caroline Rowland

Christmas gift wrapping tips

It's funny, each year, my interest and excitement about Christmas seems to vary. I'm not sure whether that depends on how busy I am in the run up to it, affecting the time I have to think about it, or whether it's what's happening in my life that year, but this year I'm already feeling really festive! It may be because this is the first year where Ruby seems aware of the whole Santa thing, so her excitement is building, even though she doesn't *really* understand it just yet. (all she knows is that she wants him to bring her a kitchen! Don't we all!)

My festive spirit was further fuelled recently when Marks and Spencer invited me along to a Christmas wrapping event, where a group of bloggers got together to help M&S wrap gifts for children (and their parents) who will be spending Christmas in Great Ormond Street hospital. I was particularly moved by the words of the GOSH representative who explained what it is like for kids there over Christmas, so it felt really lovely to be able to help out in this small way. 

With all those creative bloggers in one room, there were lots of great wrapping ideas and tips being passed around, particularly when it comes to wrapping up slightly awkward shaped items. So I wanted to share one easy way to parcel up an awkward gift as well as a few of my favourite gift wrapping tips and ideas. Above is the gift item from M&S which I choose to wrap up. 

I'm still obsessing over metallics at the moment, so this paper, plus some ribbons and bows from M&S were perfect. Below is a little tutorial for making a gift bag from wrapping paper... 

1. Cut a piece of paper large enough to wrap your item with a little bit to spare. Fold the two sides in to the middle, with one side overlapping the other.

TOP TIP:  use double sided tape when wrapping, so there is no unsightly sellotape on your seams. 

2. Fold up the bottom edge of your paper as above, this will be the base of your gift bag. 

3. Open it out and fold the sides inwards like in the above image. 

4. Then simply fold in the top and bottom flaps, overlapping slightly, and tape in place. You can also add some double sided tape underneath the folds for added support. 

5. Stand your bag up and push out the base so it becomes a little bag. You can now place your gift inside.

TOP TIP:  Wrap awkward shaped items in a layer of bubble wrap first to even out the shape. 

6. To close the bag, simply fold over the top. I tend to firstly make a small fold of about 1cm to make a nice clean edge, and then fold again with a deeper fold to finish. Again use double sided tape to seal along this edge. 

Now it's time to get creative and decorate your bag! I made two holes through the fold at the top to feed through some ribbon, then you can attach other decorative items to this. Here I've added one of M&S's amazing LED letter baubles. It's a nice touch to add an actual Christmas decoration onto a parcel as an extra little gift. Another nice idea is to add seasonal foliage like eucalyptus, a fir tree sprig or a small branch of berries - although it's generally best to add these just before delivering the gifts so that they look fresh.  

I must say, I am very much looking forward to an evening of wrapping gifts by the fire this year! It's nice to set aside some time, pour yourself some mulled wine, and to do it properly, rather than rushing it at the last minute. And of course it's a perfect opportunity to get a little bit creative! If you'd like some more gift wrapping ideas check out M&S's guide. Happy wrapping folks! x

*This post was written in collaboration with Marks and Spencer, but all ideas, choices and opinions are my own.*

Celebrating collaboration

I love a good collaboration. That's one of the things I love about blogging, as there are so many opportunities to work with great brands as well as other bloggers, photographers, stylists etc. It's also lovely to see brands collaborating with each other to produce exciting products, and this post is celebrating just that. 

British brands Christy Towels and Harlequin have come together to combine their products and design, with Christy producing a range of towels inspired by Harlequin's Amazilla wallpaper range. It's such a great idea to work with another company whose expertise can translate your designs into a product that you might not necessarily be able to produce. This is definitely something that independent designers should be inspired by, and look at who they could work alongside. 

Christy very kindly sent me some of the towels to share with you. Harlequin's Amazilla wallpapers are based on extravagant tropical motifs, so as you can see the towels are bold and graphic too. Great for adding a splash of colour to your bathroom. 

To mark the launch of the range and to celebrate this collaboration, Christy asked me to create a craft project using some of the wallpaper that inspired the new towels - so in fact, it's a bit of a three-way collaboration!! ;) 

Enter... my chance to have a crack at making some origami decorations! I've been wanting to give these a go for ages, and I should warn you.... they are incredibly addictive!! There are some things I make and I think I really don't fancy making those again, but these, oh my goodness, I just can't stop!

Rather than sharing the step-by-step instructions for making them, I'm just going to direct you straight to where I learnt how to make them. Bog and Ide blog has a great visual tutorial which I found really easy to follow. I ended up using superglue to stick mine together though, as my glue gun didn't seem to want to stick the paper I was using. 

The diamond on the left in the above pic was made using Harlequin's Pecoso wallpaper. The one on the right was made with some papers that came with Flow magazine, which I thought complimented the other one quite well. If you wanted to make these into hanging decorations, you can easily add string or ribbon through the top before you glue it together. I quite like them as simple decorations to set around the house, on the mantelpiece or a shelf... 

Are you a fan of brand collaborations? It seems to be happening a lot these days - obviously fashion brands like H&M and Topshop have done lots which often sell out in hours and some of my previous favourites have been Cath Kidston and Gola and recently two brands I love - Liberty and Meri Meri have joined forces to create some lovely party items. Shops such as West Elm have been collaborating with smaller independent brands to hold pop up shops in their stores like the recent one with The Future Kept as well as workshops with Quill London and Geo Fleur. I'd love to hear what your fave brand collaborations have been! I'm excited to start working on 91 Magazine again and do lots of collaborating! ;) 

Oh and one last thing - you MUST enter this competition that Christy Towels are running - You can win bedlinen, towels, a Roberts radio, a Fortnum and Mason hamper and much more!! A pretty fabulous prize! Enter here now

DIY: using up leftover wrapping paper

You know when you've got all those odds and sods of wrapping paper left over? Well rather than throw them away here are a few little ideas to use them up. Pop over to AO at home for the full tutorial, including a printable template for each one. 

Happy Christmas crafting! :) 

DIY: Copper and gold coasters

If you are thinking of making some of your Christmas gifts this year, or just want some handmade items on your Christmas table, then here is a simple little tutorial for some copper and pink coasters. I'm loving this colour combo at the minute, and could be inspiration for an alternaitve festive colour scheme this year perhaps?! 

I painted different designs on each of mine, but you could of course stick to one for a matching set. Get the full tutorial over on the AO Life blog

DIY: Wooden bead light pull

I love seeing homes that have really paid attention to the tiny details, like light switches, door handles etc, so I have recently updated the light pull in our bathroom with a cute beaded version which was a really fun project to do. You can find the full tutorial over on the AO blog... here's how it looks in our bathroom! 

By the way, if you ever want to have a browse of my archive of DIY projects I've created for the AO blog you can view them all here. Some of my faves are the peg bag, cloud decoration and the pom pom magnets. There's also a few Halloween ideas handy for this time of year - there's some little treat bags, and a ghostly garland! :) 

DIY: Hexagonal placemats

Nice placemats have always been something I've found quite hard to source. So when I received some lovely fabric from Zazzle I thought I would use it to make my own mats.

I decided to make them hexagonal, just for something a little different and I'm really pleased with how they turned out. Plus they make a lovely gift if you make a set of them and tie them with ribbon as I have done here. You can follow the full tutorial over on the AO blog now. 

Oh and make sure you check out the range of fabrics from Zazzle - they have a huge selection, and a great variety of weights and types of fabric. I went for a cotton twill for these placemats. 

DIY: Stencilled cushion cover

I recently received a stencil from a lovely independent business called Stencilit, who design stencils inspired by Scandi style. (you may remember a little giveaway I held a while back to win one - you can see more of their designs here) I haven't had a chance to use it until now, when I decided to try it out on some fabric and make a cushion cover. 

I just used some plain grey linen which was off cuts from some Ikea curtains, and some pink and white fabric paint mixed together. You can check out the full tutorial over on the AO blog. Below are the results, I'm really pleased with how it turned out, and it was super easy to do! 

DIY: wedding favour napkins

The wedding season is well and truly upon us! I am preparing for a hen weekend this weekend, and then the wedding in Spain in July, and know all too well how much work and planning goes into your big day It is our 2 year wedding anniversary next week so it's all still quite fresh in my memory! 

There's always so much 'stuff' on the tables, so I thought that I would share this DIY idea for reducing the clutter on your tables, by incorporating your table linen, favours and potentially place names all into one! 

You can find the full tutorial over on the AO blog today. If you don't have time to make your own napkins, you can buy ready made ones, and just add the initial to the corners... 

DIY: Floral wreath

Is it summer? is it not?! It's hard to tell here in the UK at the moment! But if you are planning a summer party or event (maybe a wedding?) then a fresh floral wreath is a lovely way to use flowers in a different way. 

I made this one using a wire coat hanger! I chose these flowers as they are some of my faves and remind me of my wedding bouquet, but you can of course select your own favourite blooms, or even dried or fake if you prefer. The full tutorial is live over on the AO blog today, so do have a peek! 

Garden refresh & DIY plant holder

The bank holiday weekend is a perfect time to give the garden a quick tidy up and refresh. The weather was a bit hit and miss this weekend, but I managed to get enough dry hours to get a few things done. 

Our shed was in need of a lick of paint and the area next to the back door was looking very sad indeed....

I'd found this metal grid in our shed ages ago, and thought I'd find some use for it at some point, so it has just been lying around. Then inspiration struck when I saw what Emily of Makelight had done in her studio. (see her little plant display here)

I gave the grid a coat of white spray paint, and then potted up a some little violas. Then I used copper wire to loop around the pots. I then fixed the grid to the wall using a few raw plugs and screws. Finally I used S hooks to hang the pots up on the copper wire. If you fancy making something similar and don't have a random metal grid languishing in your shed like me, then check out shop-fitting websites like this one for a similar thing. 

I then simply rearranged the furniture a little, moving the bench under the grid and adding a few colourful pots of flowers on the decking. Please ignore the decking by the way! This is a job for next weekend - cleaning and re-staining! :) 

I also managed to give the shed a couple of coats of paint to freshen it up and added a few pots here too. It's now much more appealing to go and sit out in our garden than before! What do you think?!

Have you had a chance to give your garden a little spruce up yet? Why not give my little plant display DIY a go! ;) 

NOTE: This post is my entry to the Garden SOS Campaign by www.mkmbs.co.uk. The challenge was to makeover a small area of your garden for under £50. I used lots of things I already had, and spent my budget on materials (spray paint, wire, s hooks, paint) as well as some new plants and a watering can! Fingers crossed I win the £500 garden makeover! ;) 

DIY: Fabric peg bag

We've had some beautiful weather here in the UK the last few weeks, perfect for drying your laundry out on the line. I love being able to do this, especially as it means not having a clothes horse inside cluttering up the house. I made this little peg bag the other day which makes the chore more enjoyable too! You can follow my tutorial for making your own peg bag over on the AO Life blog

WIN a Scandi style wall stencil!

If you fancy some pattern on your walls, but find wallpaper expensive and/or daunting to put up, then what about decorating using a stencil? Stencil designs have moved on a lot in recent years and I was particularly excited to discover StenCilit on Etsy. Their designs are fresh and modern and inspired by Scandinavia.

5.jpg

StenCilit is based in Estonia, and designer Merili Sulg has a background in screen printing and wallpaper design. There are nearly 50 different designs in her Etsy store, so lots to choose from, and of course it is up to you what paint colour to use and also how to utilise the stencil. It could be to completely cover an entire wall or just as a small detail. You could even use the stencil on the floor or on fabric, so it's a really versatile product that will only set you back between £25-30! 

The image below shows the Siberian Taiga design (my personal favourite!) in situ in Justine Hand's child's room. You can also follow her 'how-to' of using the stencil over on Remodelista which is very handy. 

Boreal Forest stencil.jpg

I'm excited to share that StenCilit have offered for one lucky Patchwork Harmony reader to win a stencil of their choice - hurrah! All you have to do to enter is visit the StenCilit Etsy shop, and choose your favourite design. Let me know which one you love as well as how and where you might use it via a comment on this post. I will then choose my favourite reply after the closing date which is the 10th April 2015.

Merili & her team would love it if you liked their Facebook page, and shared your fave design on your Facebook too! Show them some love! :) 

Terms and Conditions:

- Please make sure to leave a contact email address with your comment so you can be informed if you win. 

- If the winner does not respond within 14 days with their postal address details, I will select another winner. 

- The competition is open to readers worldwide.

- Only comments posted before 11:59pm on the 10th April 2015 will be valid. My decision on the winning comment is final.

Here are a few more of my favourite designs to whet your appetite! I can't wait to try one of these out myself. I'm thinking perhaps on a set of plain curtains! Good luck everyone! 

DIY: Mini Easter gift boxes

Where is this year going?! Easter is just around the corner already! I've designed these little mini gift boxes perfect for mini eggs or other little treats for the kids. Or they are even nice for adults if you are having an Easter lunch party. I'm just enjoying having them dotted around the house filled with eggs! 

The tutorial for these also includes downloadable templates so they are super easy to make! Full instructions are over on the AO Life blog

DIY: 5 quick handmade Valentines cards

If you fancy making your significant other a handmade Valentines card this year, but don't have much time, don't despair! I have five super simple and quick ideas to choose from! Here they are, you will find the instructions for making them over on the AO Life blog...

Happy Valentines Day all! xxx

DIY: pom pom trim seat pads

You might remember a little while ago I shared my dining chairs makeover? After painting the chairs in two Farrow and Ball colours, I decided to make seat pads to tie the look together. I chose two fabrics from M is for Make, and was able to alter the shape and size of the seat pads to match the individual chairs. My tutorial for making these is up on the AO Life blog, so if you fancy a go, pop over there for the full instructions

DIY: copper votives

I forgot to share this post I did for AO Life just before Christmas! But as you can use these copper votives any time of the year, I thought I'd pop the link to the post on here anyway! It's super simple, and involves spray paint which is always fun! Find the full tutorial here Oh and be sure to check out the rest of AO's blog, it has just been relaunched and has lots of great content including 12 steps to a winter home refresh and this amazing pavlova recipe.

DIY: Paper gift bag

Wow, Christmas really is fast approaching isn't it?! If you are thinking of going handmade for your gifts this year, well why not package them in a handmade gift bag too?! Those bags are so expensive to buy and all you need to make them in some card and pretty wrapping paper! 

I've shared the tutorial and a template to make these over on the AO at Home blog, so pop on over to give it a go yourself! 


DIY: Yarn wall hanging

If you are thinking of changing up your wall decor for the winter months then you probably won't have failed to notice that wall hangings are having a bit of a moment, especially woven ones. But if weaving your own one seems like a little bit too much of a commitment then try this simple one I created for the AO at Home blog. It is super simple and fun to make...

Full tutorial here.