Editor's Life: Helen Martin of Lionheart magazine

Previously, I've written a bit about how 91 Magazine came about, its evolution and how I run it, but as all indie magazines do it differently, I've decided to run a series of interviews with other independent magazine editors to find out a bit more about their passion project - the story behind it and why they dedicate so much of their time to producing a print magazine. First up, I chat to mum of two Helen Martin, founding editor of Lionheart - a lifestyle publication featuring style, culture, stories, interviews, travel, photography, craft and illustration. 

the last three issues of Lionheart. Photo: Caroline Rowland

the last three issues of Lionheart. Photo: Caroline Rowland

PH: Hi Helen! Welcome! So, what was it that inspired you to launch Lionheart magazine?

Helen: I wanted to communicate inspiring, unique and intelligent good feeling through words, images and design, plus the tactile aspect of holding an uncoated book in your hands, bending pages, cutting out pictures. It’s for browsing, reading, figuring out and doing with however you please. Women/humans are so complex, multifaceted and interesting, not one dimensional. We are constantly changing, reacting, growing and learning and I wanted to make something rounded that reflects this, inspires and nourishes from the inside, ticking all the boxes. Interviews, stories, books, beauty, style, interiors, wellbeing, illustration and photography. A massive ask and the only way to not be massively overwhelmed has been to always follow my instinct 100%. Ignore the dishes/bills/other influences/‘targets’/coffee cups/setting sun. All I want to know: what makes something sing, what gem is in here? Is there some sort of answer to a question/moment/life? The good is when you perhaps understand or gain an insight into something real and true, you can identify and it stays with you. Does this make sense?! Sorry, my answer was longer than intended!

Founding editor Helen. Photo: Kasia Fiszer

Founding editor Helen. Photo: Kasia Fiszer

PH: What is your background? Do you have a lot of publishing experience?

Helen: I started out writing creative first person pieces, as well as interviews, fashion and music. I did a lot of interning and freelancing for various independent and other mags, while also working in a whole host of part time jobs, from a call centre to fancy dress shop. I soon worked part time at the local newspaper while I did my NCTJ and also started a blog, then began working as the music editor and reporting on some really fun things like London Fashion Week for Amelia’s Magazine. I probably learnt the most about production while I worked as a f/t editor for a publishing company before having my first baby. Flexible working was out post-babe, so I returned to work at a different company as a lifestyle editor, before becoming freelance. I like freelance writing and have also worked for some lovely brands doing their digital marketing and putting on events. But throughout all of this, has been Lionheart! Since 2011.

PH: How do you go about planning your issues and sourcing contributors?

Helen: It starts with notes on my phone, Pinterest, screenshots. Plus lots of tear outs and a notebook. I still use scrap books! It’s pretty convoluted for a month or two and then whoosh. Everything suddenly gears up and I contact everyone – old and new contributors that I have found or they’ve found me – and start things moving. Holly Giblin, my designer  and I work closely and slowly things start to flourish (can’t think of a better word) I guess! It all starts to fall into place and the buzz is magic and shared with contributors. I have to admit that I am really bad on the page plan and always do this last. GASP! I would only ever, ever do this with Lionheart. It just works this way! (Sorry, Holly!) It’s the best feeling seeing it all come together though, all these ideas and visions in one 96 page magazine.

Les Fleurs flower shop featured in Issue 8. Photo: Kasia Fiszer

Les Fleurs flower shop featured in Issue 8. Photo: Kasia Fiszer

PH: What is the most rewarding part about running an indie mag?

Helen: 1. That people enjoy it. 2. Seeing something you have imagined in print. 3. Working and meeting with brilliant and inspiring people. 4. The community of independent print magazines, I’m so proud to be a part of it and I love magazines like 91 Magazine so much. 5. My daughter pretending she runs a magazine.

PH: What is the most challenging part?

Helen: The bit just after the ‘flourish’ when it’s all there, staring at me on my laptop and I go - uh oh! Too close to it, too scared, too everything. It’s terrifying printing on your own, it really is. Like releasing any product of your own. But once through this, it’s back with NO, I LOVE this! This is what it’s about. Exciting. You have to have the highs and lows, I think. Also, I wish I had learnt a little more about business at school. I hope more schools and colleges emphasise being self employed as an option, as it will only increase I’m sure. Luckily though, there’s lots of help out there, such as communities like Doing it for the Kids. Plus inspiring business owners. You don’t have to muddle through things, ask for help.

Home of Kelly Pike, featured in issue 8. Photo: Kasia Fiszer

Home of Kelly Pike, featured in issue 8. Photo: Kasia Fiszer

PH: Why make a print magazine instead of a digital product?

Helen: I think probably for the same reasons as you print 91 Magazine, print is more attainable – it’s real with vivid colour, words and beautiful design. Importantly, it’s also something to keep and return to. I love going back to a magazine and re-reading it, getting something new from it or reinforcing a feeling. Like listening to a favourite song. Paper for me, can’t be beaten, whether a book or a gorgeous independent magazine, as a whole it has a strong impact.

PH: Do you think running a print magazine will ever be your sole income? (is it already?)

Helen: So totally not! One day, I hope so. Then I can also write a book and learn French!

Fashion story from issue 8. Photo: Nell Mallia

Fashion story from issue 8. Photo: Nell Mallia

PH: What are your dreams and goals for Lionheart?

Helen: Just for it to continue for as long as I love creating it and people would like it in their lives. Even though I say I might stop it sometimes, I can’t ever imagine doing this. I don’t think I can. Lionheart roars deep inside!

Thanks to Helen for sharing her indie magazine story. You can order Lionheart via the website or check out the stockist list. 

A year in our home - what we've done

The end of September marked a year since we moved into our new home. The buying process was pretty stressful but we are so pleased we persisted; we are so happy here, not only with the house itself but with the area, Ruby's nursery and the fact that we can have family and friends stay anytime. As a little one year anniversary celebration and to remind myself how far the house has come in a year, I thought I'd do a little round up of the changes we've made to the place so far... I hope you enjoy this 'half home tour'! I'm linking to the full room tour posts for each if you'd like to see more... 

living room makeover
living room fireplace
living room shelving
living room play area
living room reading nook
BEFORE

BEFORE

Downstairs we have a large living area which is two rooms knocked together. As you can see from the 'before' shots, it was dark and a real mis-match of colours. We swiftly had the textured ceiling skimmed, painted everything white and laid a parquet floor. We also re-painted the two fireplaces and laid some new tiles. We replaced one of the radiators and added a new one under the window. That is pretty much all we did in terms of decorating for this room, and it has been completely transformed! There are actually three posts about this room - the furniture, the features and the play space, if you'd like to know sources etc. 

downstairs loo - pink floor tiles
BEFORE

BEFORE

Actually one of the first rooms we had to do was the downstairs loo. The floor was about to collapse, and being such a handy amenity we wanted to sort it asap. It was a complete refurb - new floor and wall tiles, new skirtings, new toilet and sink and everything painted. Full makeover post is here. The rest of the downstairs is a project for this year - we are planning to open up the kitchen and conservatory and refurb those, as well as decorating the hallway. 

creative home office space
office / spare bedroom makeover
creative home office
office storage
BEFORE

BEFORE

Upstairs on the first floor is 4 bedrooms and the bathroom. I use one of the bedrooms as my home office and it also has a day bed for when we have lots of people staying. This room has got to be one of the most dramatic changes! As you can see above, the room was DARK, and had some decor quite unique to the previous owners... The painted paper was coming off, so it was stripped only to reveal that the walls were in a bit of a mess. The walls and ceiling were replastered and we pulled up the carpet. The floorboards were in good nick though, so those were painted white and I left half of the walls as bare plaster and painted the rest and the ceiling in a pale pink. Again, relatively minimal in what needed doing to completely transform this space. I then added lots of other touches which you can read more about on the original makeover post

Girl's bedroom decor
little girl's bedroom makeover
children's bedroom decor
BEFORE

BEFORE

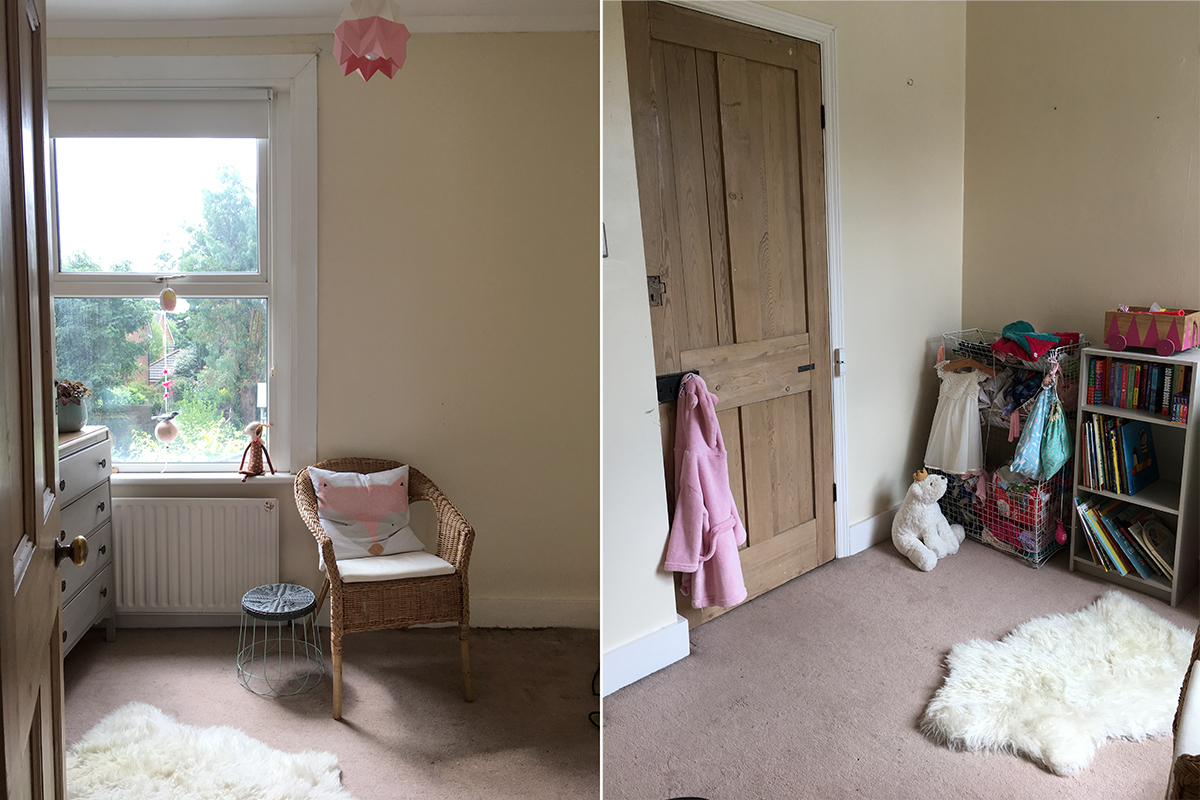
Again, Ruby's bedroom was pretty straightforward in that we just stripped the walls, had them replastered and pulled up the carpet. Everything was painted white and we hung some wallpaper on one wall. We also changed the blind on the window, but that was it. It was so much fun picking out all the decorative details for her room - you can find out more about those in this post

PA011598_1200.jpg
guest room makeover
small bedroom decor ideas
BEFORE

BEFORE

I totally forgot to get a proper 'before' shot of our little single guest room. It had carpet tiles on the floor which I think I pulled up on pretty much our first day here! It was relatively neutral in here, but again we just painted everything white straight away. I did a temporary makeover in here in the first month of moving in, and have just got round to doing it properly and I'm so happy with this little room now. It feels like a cosy little space to retreat to - all the details are in this recent post. We have one more bedroom and the bathroom to do on this floor, as well as updating the stairs and landing. 

pink and white bedroom
loft conversion bedroom
BEFORE

BEFORE

Our bedroom is up another flight of stairs in the loft conversion, and is in a temporary state at the moment. I forgot to take proper 'before' shots again (!) but this one was from when we viewed the property. I've got bigger plans for this room, but in the meantime we painted the dark purple walls in white, and took up the dark blue carpet. There were no nice floorboards like the rest of the rooms as it's a conversion, so we opted for some white laminate flooring instead. It's a lovely light, bright room, I can't wait to properly get to work on it! There's a full post on what we've done so far with sources here.

P7060070_1200.jpg
en suite in loft conversion
small bathroom ideas
BEFORE

BEFORE

Last but not least, there was a little room next to the loft bedroom that was kind of a nothing room. As soon as we saw it, we said it would be a perfect en-suite. So that's what we did. It's not particularly straight-forward putting a bathroom in a loft conversion, but we thought it would be worth it, and it definitely was. It's great having a bathroom on this level, especially when we have guests. All the details and sources (and the woes) are in the full makeover post

So there you have it! Turns out we've done half of the rooms in the house in our first year! yay! I'm sure my hubby will be glad to hear me say the goal is to finish the other half by this time next year! ha! I hope you are enjoying seeing our progress, I know I am loving transforming our home. Do let me know what you think! x

Small bedroom makeover

As I mentioned in a recent post, I had given our little single spare bedroom a quick makeover when we first moved in (it had carpet tiles on the floor and a pine bed frame before!) but even after that it was never really how I wanted it to look. So recently, as I had some Farrow and Ball Off Black paint left from painting our fireplaces, I decided to repaint the bed frame in it and update the room with a boho monochrome look with a few botanical touches.  

boho monochrome style bedroom

Now I am SO happy with how it looks and love a little glimpse in it every time I go upstairs! I received this amazing HUGE Moroccan blanket from Moroccan Bazaar, along with the first and third cushions on the bed. These helped to set the basis for the room design. If you haven't heard of Moroccan Bazaar, they are a long established company importing Moroccan furniture, lighting and accessories to the UK market. They have a showroom in West London, and supply to the retail and commercial sectors. The berber throw and cushions are handmade using artisan techniques on looms from a 100% natural wool and feel so authentic. The blanket is actually folded in half here so you can imagine how big it is, so would also work well on a double bed or sofa too. 

Boho monochrome style bedroom
Moroccan Berber cushion with pompoms
Moroccan Berber throw and cushions

As you can see, the furriest member of our family is a big fan! I couldn't even bring myself to remove her to take these pics! I think she likes sitting by the window so she can keep an eye on things outside! 

Small bedroom ideas
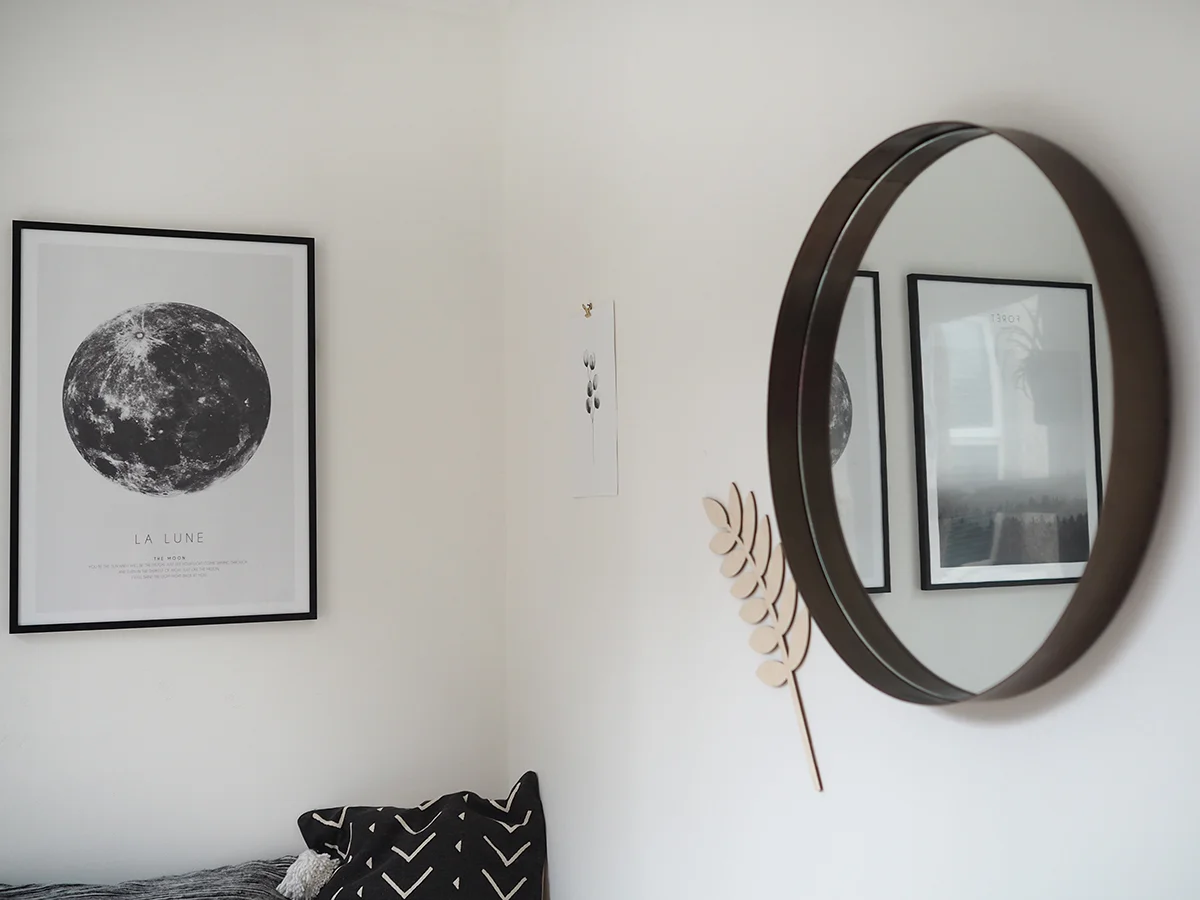
Monochrome posters by Desenio
small bedroom decor

I then simply sourced a few extra details to add to the room. These amazing art prints are from Desenio. I discovered this website a little while ago, and got completely lost in browsing their collection of artwork, which ranges from photography to illustration to typographical prints. It is super affordable with small prints from as little as £2.95. Plus you can choose from a range of frames to fit your print choices. I got the two main posters in 50cm x 70cm with the frames and the little one in the corner at 21cm x 30cm. I've got a special 25% off reader discount for Desenio at the bottom of this post, so do take a peek, there is SO much to choose from! 

boho scandi bedroom
monochrome hanging planter  -Maison du Monde
peperomia plant

The other two cushions are from H&M and the mirror and the hanging planter are from Maison du Monde, and how beautiful is the plywood laurel leaf by LaLa Loves Decor? I love mixing artwork with items like this on my walls. The peperomia plant I picked up at the Conservatory Archives pop up in Liberty along with the stripy plant pot.  

boho scandi bedroom
boho scandi decor
small bedroom ideas
boho monochrome bedroom

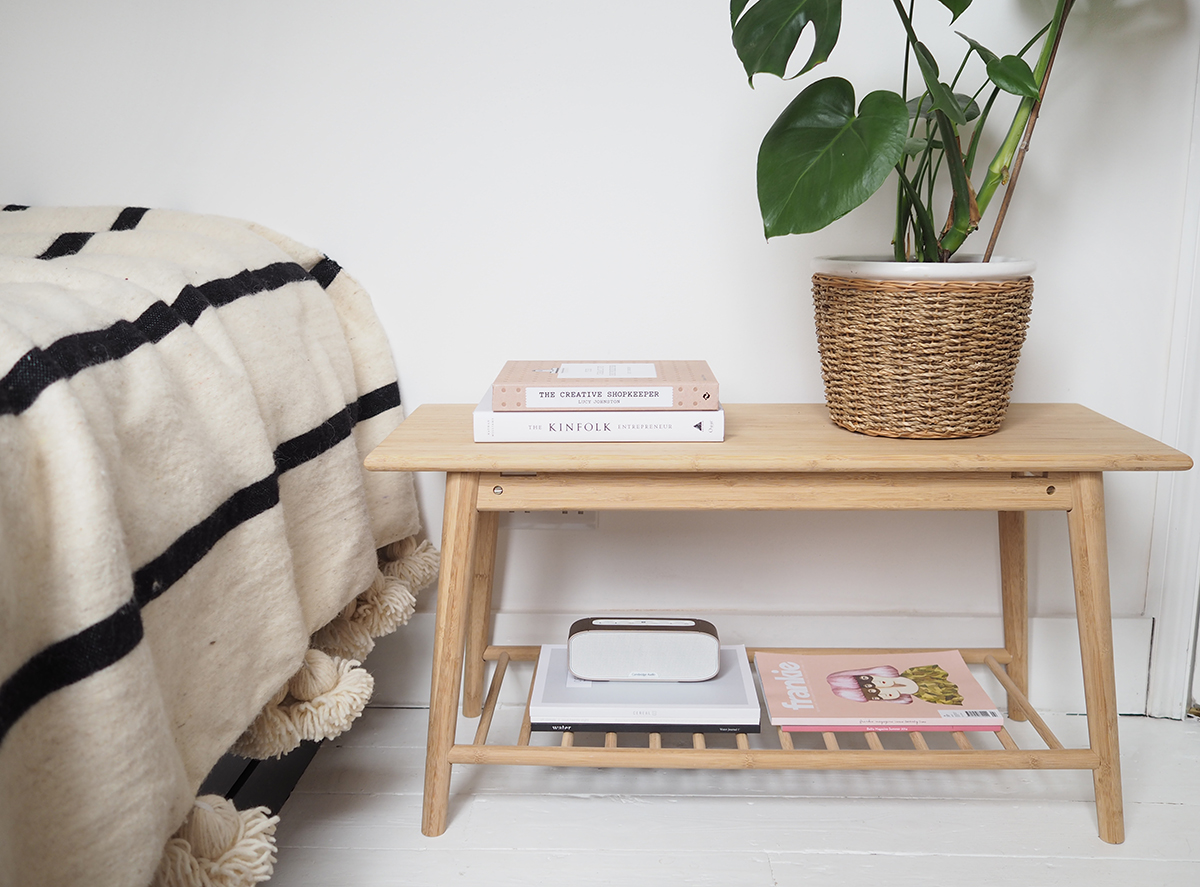
As it's such a small room, we don't have much other furniture in there - just this table and a clothes rail, both made from bamboo, from Cox and Cox. Oh, and the final touch was this beautiful curtain from Urban Outfitters which ties in perfectly with the pom pom details on the cushions. I kinda wish we could just magic this room bigger and made it our own bedroom! It feels like such a cosy little spot to go and have some time to yourself, catch up on some magazine reading and hang out with Claude, who is now a permanent resident in here! I'd love to hear what you think! And as promised, here is the discount code for Desenio to treat yourself to some gorgeous artwork....

Discount code "patchworkharmony” gives 25% off posters* between 3rd - 5th October. 
*Except for handpicked/collaboration posters and frames.

Boho monochrome small bedroom style

*Thank you so much to the brands who provided complimentary items to assist with this makeover - Moroccan Bazaar, Desenio and LaLa Loves Decor. I truly love what all of these companies have to offer and hope you do too! 

September: A Month of Lovely

It's been a super busy few weeks with getting the new AW17 issue of 91 Magazine to print, I'm SO excited for you to see it! It is definitely feeling much more autumnal right now and I'm quite enjoying wearing cosy jumpers and lighting more candles... here's what else has been making my month lovely...

#amonthoflovely

Wintery foliage - I was actually working on a Christmas related feature for In The Moment magazine so was using this gorgeous eucalyptus, and it reminded me how much I love this kind of foliage in the house - in vases, made in to wreaths, even just taped to the wall! I will be stocking up on this in the coming months I'm sure. 

Candle love - I love candles any time of the year, but the darker mornings and evenings obviously call out for more of this comforting light. This little beauty is from Arum London - natural wax candles, hand-poured in London with super luxe branding. Mine is Fig and Cassis and smells divine. 

Copenhagen planning - I am VERY excited about my birthday trip to Copenhagen next week! I've wanted to visit Scandinavia for a long time, and it is just myself and the hubby going, so it will be wall to wall eating, sleeping and shopping - and this lovely book is going to tell us the best places to do those things! Well, we already know where we are sleeping - a lovely Air BNB in Frederiksberg - but otherwise we haven't made any plans. I just need to find some time to sit down and actually read the book! All Copenhagen tips welcome!

Plywood decor -  I am still totally obsessed with plywood. I've written about plywood bedrooms and I've shown you my plywood book shelf and I've got a plywood kitchen post coming up! I also added lots of plywood elements to Ruby's new bedroom. This lovely laurel leaf from LaLa Loves Decor is the latest addition and is so beautifully made - it'll be popping up in another bedroom makeover very soon! 

Happy and Co tea towels - There is something particularly pleasant about a product arriving in a drawstring bag. It's the small things in life, don't you think?! It does it for me anyway! :) Happy and Co design and make homewares in partnership with skilled craftspeople all over the world and also invest 10% of their profits into the Happy + Co Farm in Cambodia. This story along with the gorgeous monochromatic prints of these tea towels are making me particularly happy right now! They are certainly helping to make our 'in need of ripping out' kitchen look a bit more stylish! 

*thank you to Arum London, LaLa Loves Decor and Happy & Co for gifting me these lovely items. 

My daughter's bedroom makeover

It's taken us a couple of months to complete Ruby's bedroom makeover, you might remember my post in July about the plans for it? We had to have it completely re-plastered, then it obviously needed painting - walls, ceiling and floor, as well as hanging the wallpaper. Then we had the unexpected hold up on the bed taking about four weeks to arrive from Denmark. That was my own fault really, as I should've checked in advance how long it would take and ordered well in advance - note to self! 

toddlers bedroom decor

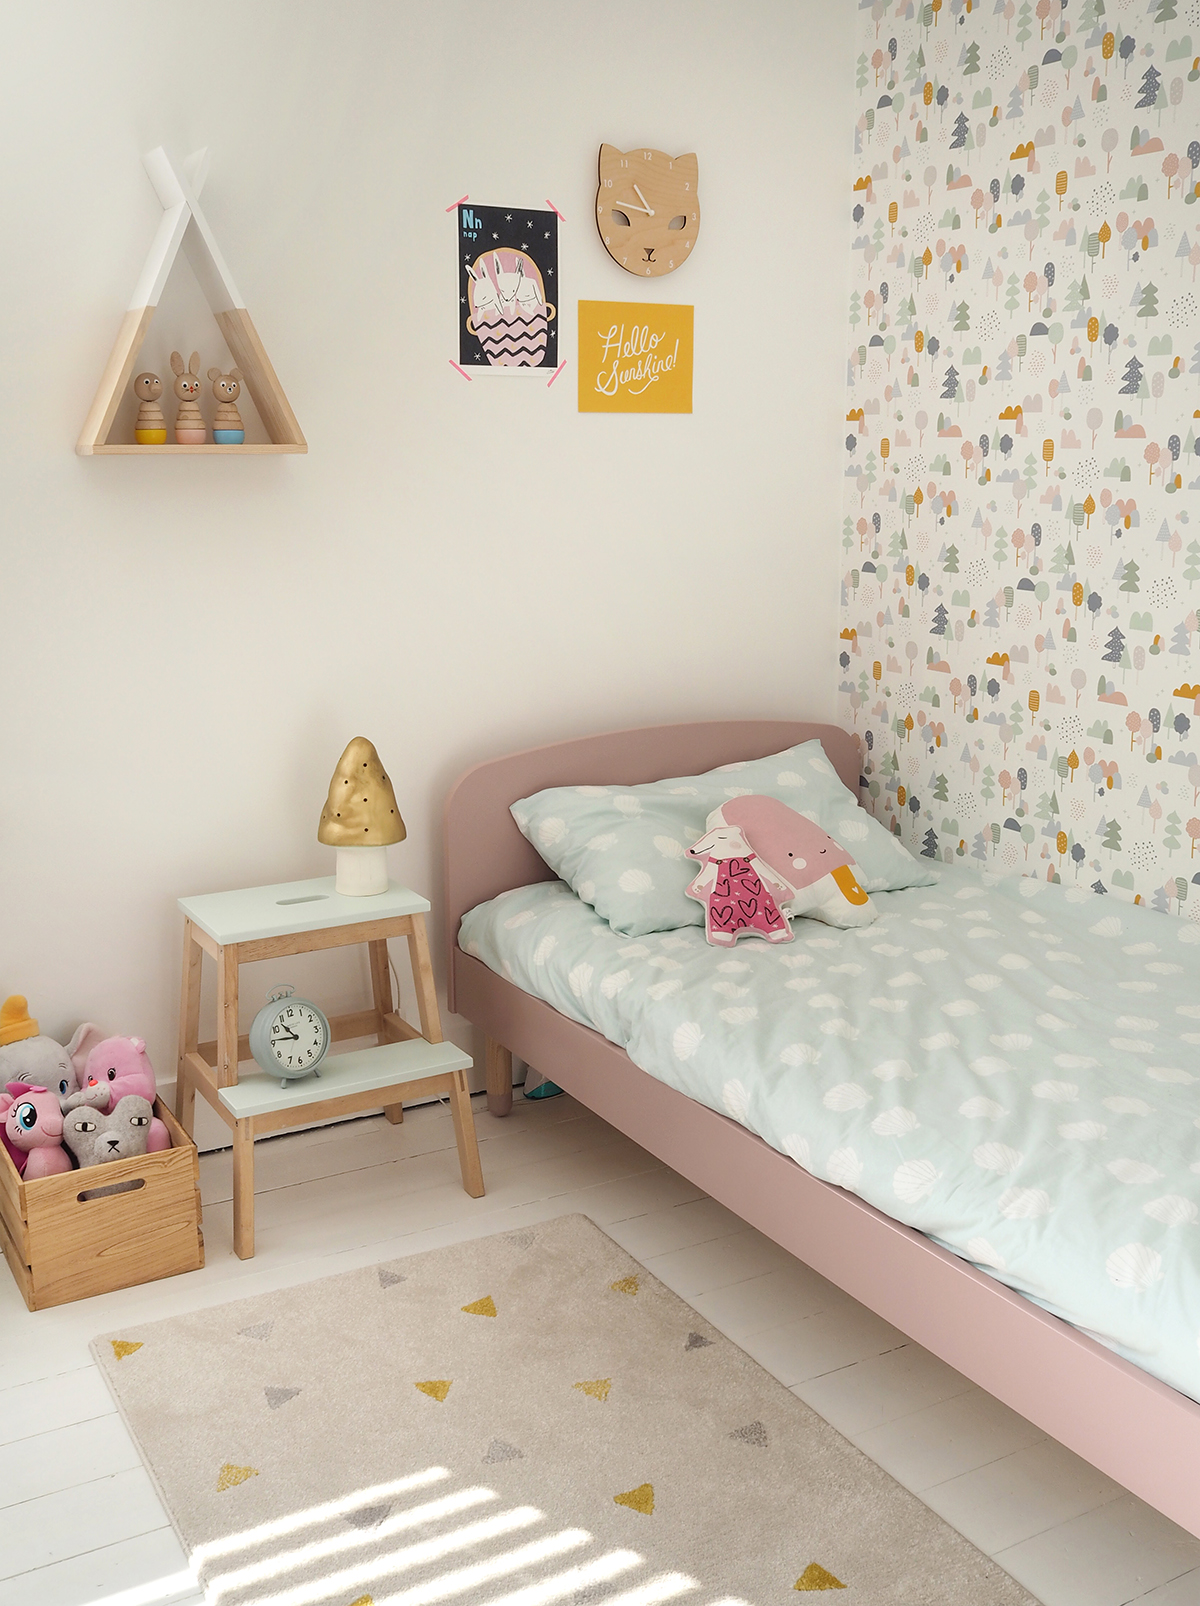
We got there in the end and I am thrilled with how it looks, as is Ruby! This is her first 'big girl's bed' and she's taken to it so well. It is the Flexa Play bed which we got from Junior World. It is a full size single, but it's great that it is not too high. The design is Danish and is so lovely, I particularly love the legs and Ruby particularly loves that it is pink! It does feel like quite a big milestone moving your child from a cot to a bed, so I wanted to make sure everything was just right. I wasn't sure what the deal was with kids bedding, but thankfully I was introduced to The Fine Bedding Company's kid range via Rooi.com. This little guide to kids bedding is handy if you are grappling with this too. I ended up going for a standard duvet and pillow which are washable and hypoallergenic. I then found this bed linen on Urban Outfitters website in the sale for only £18 which I was really chuffed with! The rug was also a great find - I had been eyeing up Olli Ella's gorgeous Teepee rug, but at £349 I just couldn't afford it, but I found this one on La Redoute (they have some great rugs!) for about a 10th of that price - currently it is just £39!

toddlers bedroom - Ikea upcycled stool side table
toddlers bedroom makeover

If you saw my 'plans' post, you'll know that I based the design of the room around this gorgeous wallpaper designed by Cathy Nordstrom, which I bought via Photowall. I'm SO in love with it! There are lots of things in the room which I had before and have just updated a little - so the Ikea step stool was just given a lick of paint (Dulux Tuscan Glade 5) and is now a bedside table. I bought the little shelves in a charity shops years ago, and I just repainted those with the same paint. 

small toddlers room decor

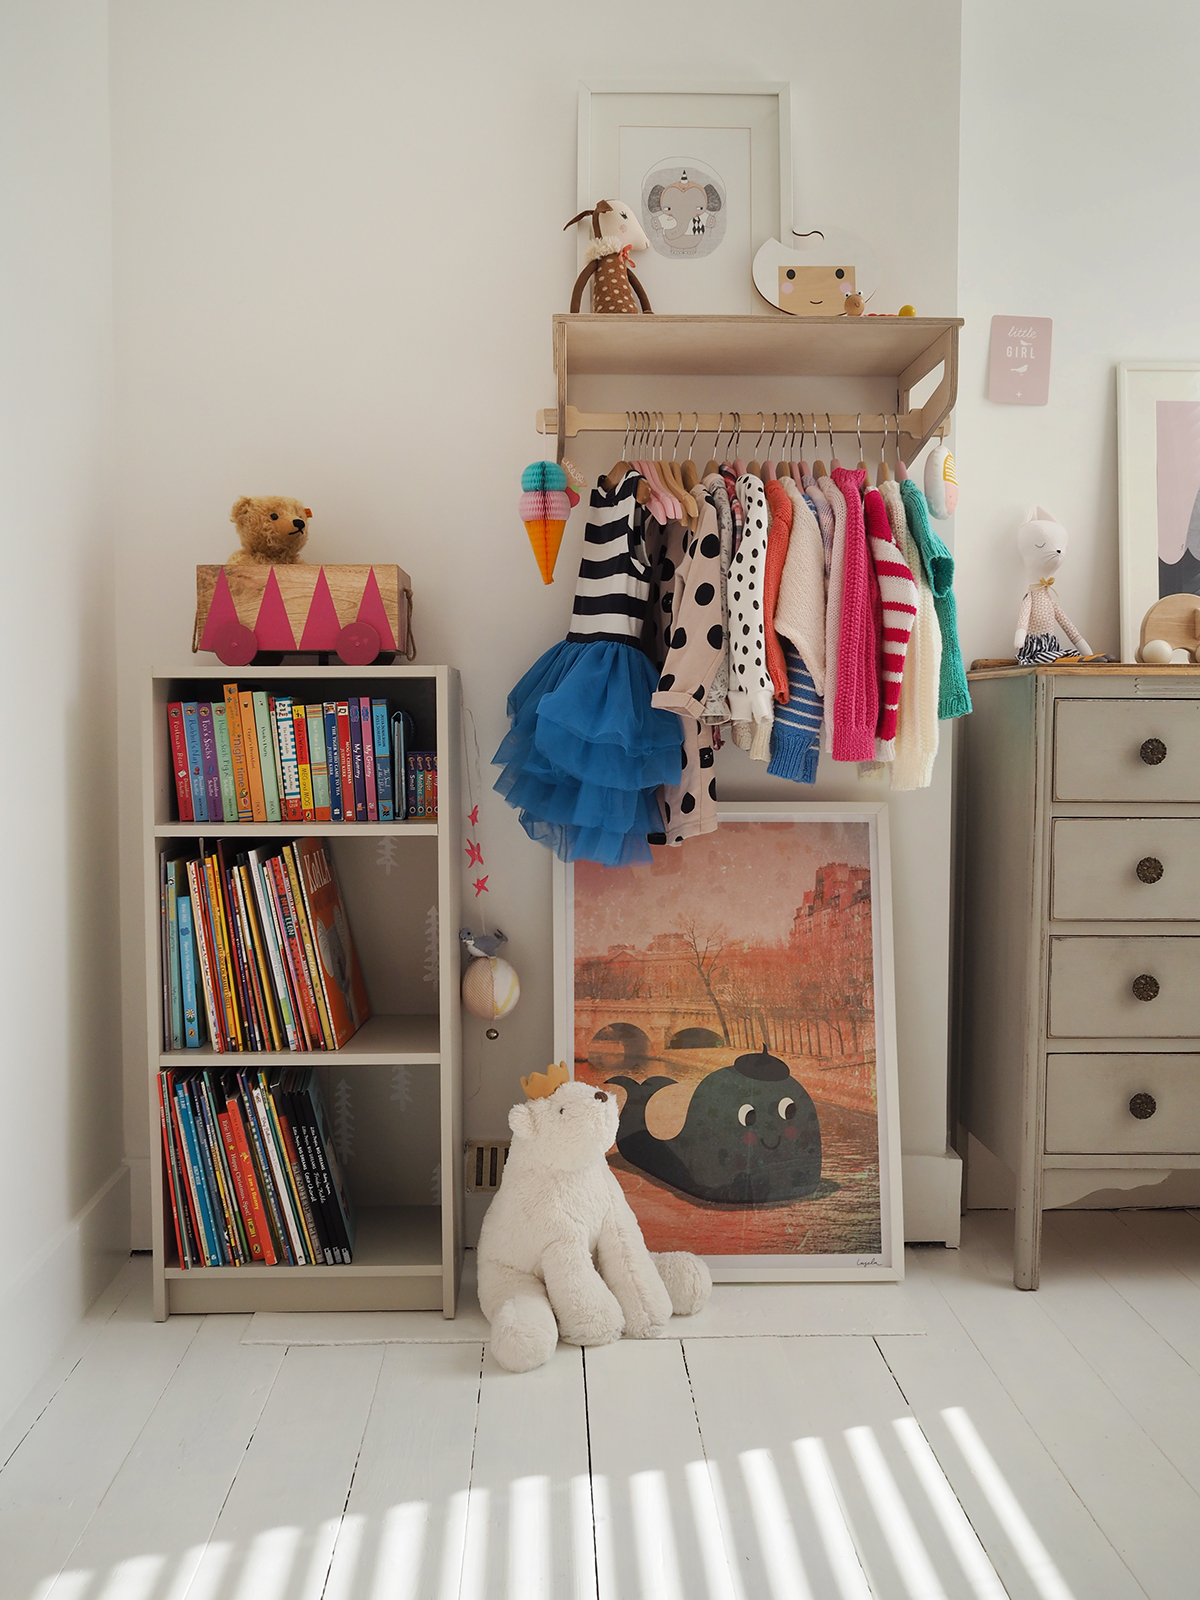
On the other side of the room we have the same vintage drawers (bought on eBay) that we had in Ruby's old bedroom, but as she now has a bigger collection of clothes I've added this clothes rail from The Modern Nursery. It is also Danish in design, made from birch veneered plywood, and it the perfect solution if you are lacking in space for an actual wardrobe. It was also SUPER easy to put together (no husband required!) and has the added bonus of the little shelf on top for extra storage or display. 

The other thing we replaced in the room was the window blind. Before it had a grubby old roller blind left by the previous owners, which did the job, but looked awful. So we went for this fresh white wood venetian blind from Make my Blinds, which looks a million times better, and I really love the stripy shadows it casts which the sun is shining! A husband was required for the assembly and hanging of this, but his report was it was very easy to do. I always tend to dread choosing and ordering blinds, but this website did make it super straightforward, so I think I'll be using them again if we need any further blinds custom made. 

little girl's bedroom design

Ruby absolutely loves books and she's amassing quite a collection, so this bookcase was actually a very swift, essential purchase when we first moved in, as I didn't have time to source anything else. It is from Argos for just £23.99. I wanted to give it a bit of a personal touch so I stencilled a design on the back of the shelves which you can just make out here with a stencil I already had from Stencilit. All the artwork you can see above we had in Ruby's old room - so do check out this post if you want to know the sources. 

One of my favourite things about designing a room is sourcing all the little details, and it's especially fun for a child's bedroom. There are so many gorgeous indie brands for kids around now, so below I've just put the info about all the finishing touches... 

child's room styling
child's room wall shelf

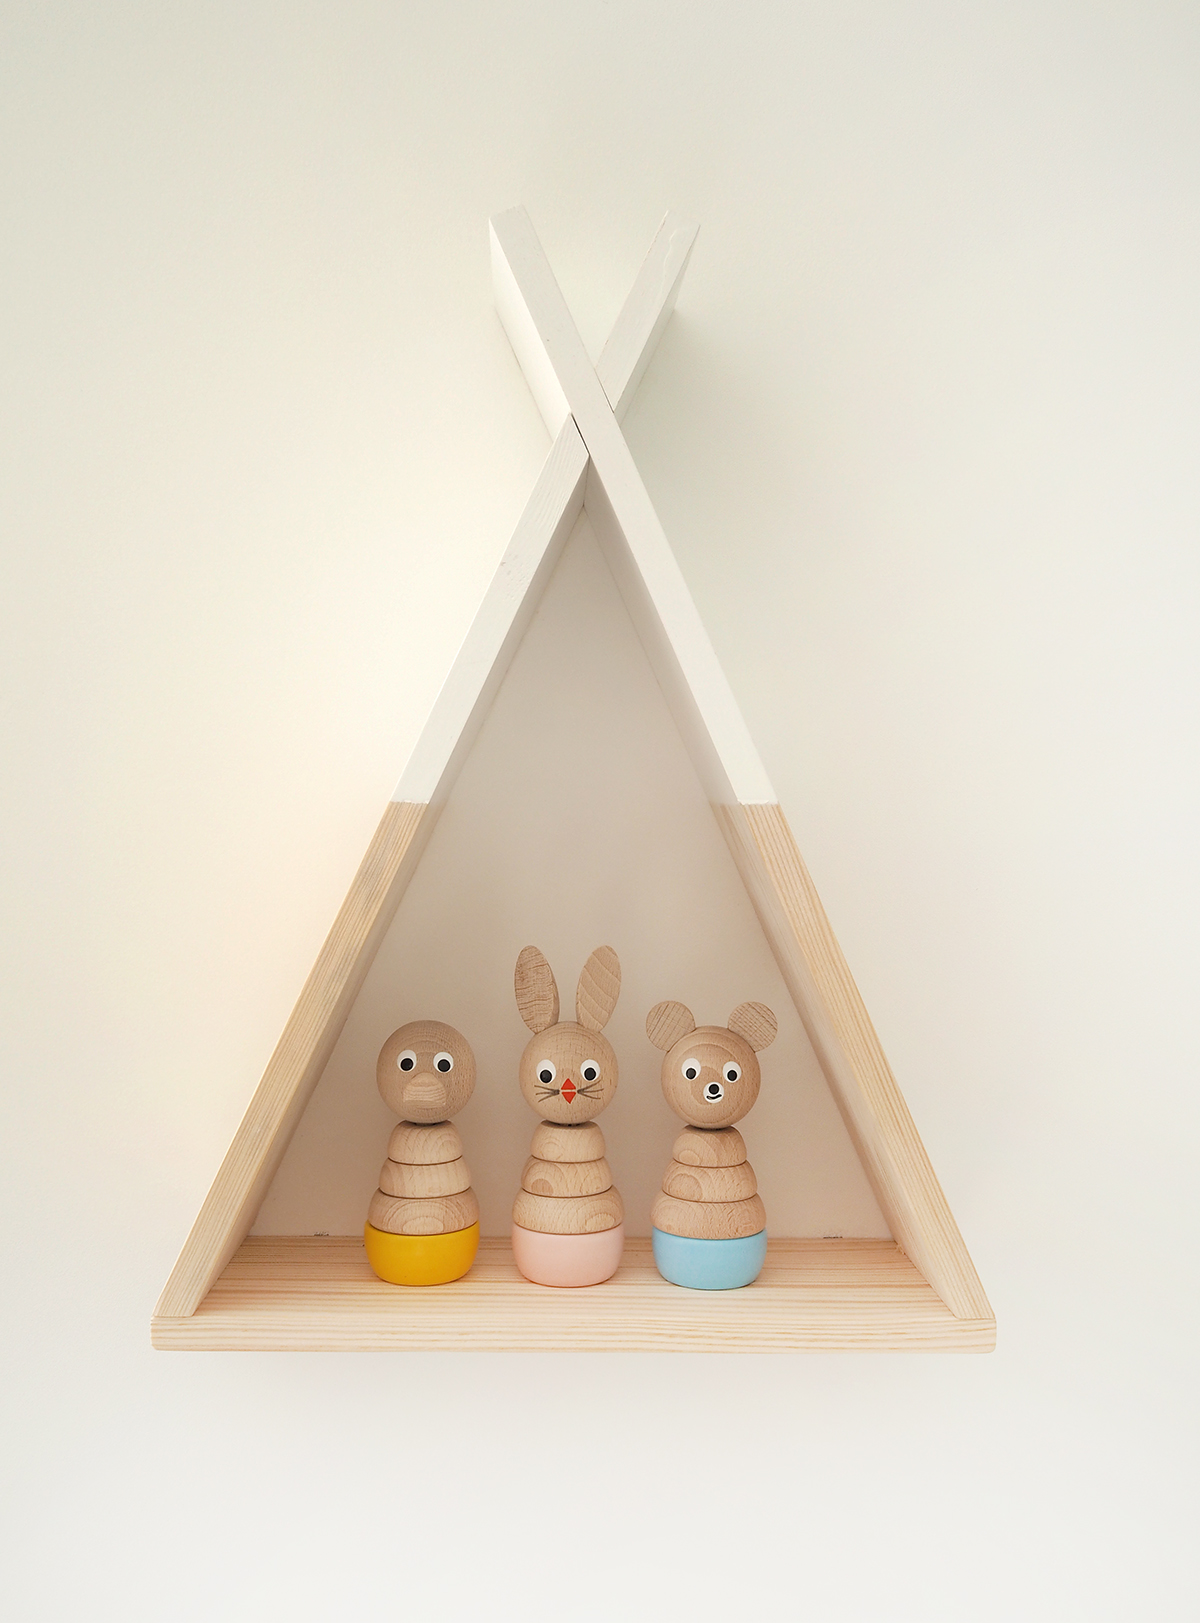
I just LOVE this little tipi shelf which is by Childhome at Cuckooland. They also do a bed and a play tent and some stylish high chairs and other nursery furniture that are well worth a look. I've accessorised it with these cute as a button toys by Sarah and Bendrix. I came across this brand years ago, even before I was a mum, so I was excited to discover their shop is just up the road from us now in Cheam. If you are in the area it is worth a little peek - gorgeous toys, books, and decor for children, as well as a few gift items for adults. 

Nap print, £18 - Little Carousel; Cat clock, £25, Red Hand Gang, Hello Sunshine print, £16, Papermash

Nap print, £18 - Little Carousel; Cat clock, £25, Red Hand Gang, Hello Sunshine print, £16, Papermash

North bear (custom design), £18, Little Carousel;  Ice cream cushion - I bought from Papagaio in Crystal Palace, but you can find here too: Ava's Dreams

North bear (custom design), £18, Little Carousel;  Ice cream cushion - I bought from Papagaio in Crystal Palace, but you can find here too: Ava's Dreams

Miss Kitty Doll, £30, Sarah and Bendrix; wooden elephant - I found him at a car boot sale. 

Miss Kitty Doll, £30, Sarah and Bendrix; wooden elephant - I found him at a car boot sale. 

Wooden face clothes hanger, £14, Red Hand Gang

Wooden face clothes hanger, £14, Red Hand Gang

hanging decoration is by Hesperoo, but doesn't seem to be available anymore; Hangers, £3 for 5, Ikea; Knitwear by Ruby's nanny! 

hanging decoration is by Hesperoo, but doesn't seem to be available anymore; Hangers, £3 for 5, Ikea; Knitwear by Ruby's nanny! 

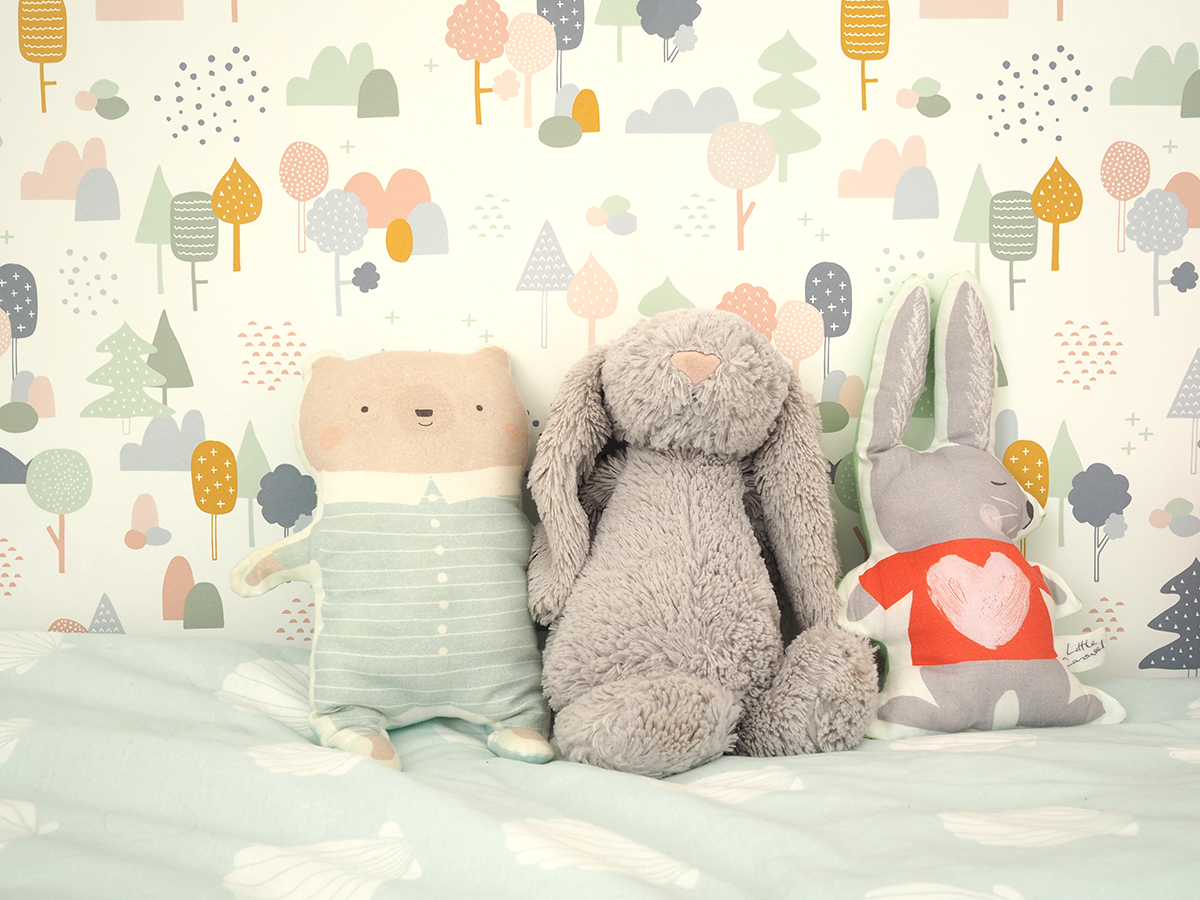
Sleepy bear toy, $28, Petit Pippin; Jellycat bunny was a baby gift, see John Lewis; Love Bunny toy, £16, Little Carousel

Sleepy bear toy, $28, Petit Pippin; Jellycat bunny was a baby gift, see John Lewis; Love Bunny toy, £16, Little Carousel

Wooden pear, £10, LaLa Loves Decor; Ballet book, car boot sale find, Panda money box, vintage shop find; painted car, gift from grandparents; Wooden bear & triangle (part of a set), £42, desEnfantillages, Dinosaur light, £11, Sarah and Bend…

Wooden pear, £10, LaLa Loves Decor; Ballet book, car boot sale find, Panda money box, vintage shop find; painted car, gift from grandparents; Wooden bear & triangle (part of a set), £42, desEnfantillages, Dinosaur light, £11, Sarah and Bendrix

Plant pot, from This Modern Life, no longer available

Plant pot, from This Modern Life, no longer available

Steiff teddy, gift from grandparents; Wooden box from H&M, no longer available. 

Steiff teddy, gift from grandparents; Wooden box from H&M, no longer available. 

children's book storage
Little girl's bedroom style

Oh, and if you were wondering what the room looked like 'before', see below! It had a dirty beige carpet, the walls were covered in paper painted in magnolia, and the ceiling was artex. Drab drab drab!

before.jpg

It's not a big room by any means, so there's not that much to see, but I hope you've enjoyed a little peek at what we've done to the space! I did buy the majority of the items for the room myself, but there were a few ideas that were kindly gifted to me. I only ever accept gifts of things that I love and would buy myself, but just so you know, these are the items gifted for this makeover. Thanks so much to the lovely brands for helping out on this. 

Kids single duvet and pillow - Rooi.com / Venetian blinds - makemyblinds.com / Tipi shelf - Cuckooland / Wooden pear - LaLa Loves Decor

Please vote! Interior Blog Awards

It's been a busy week, juggling various work projects and motherhood, but I just wanted to pop in and say, firstly - what do you think of the new blog design?! Last week, on a bit of a whim, I decided to redesign it, including my logo which I'd got really tired of. I'd love to hear what you think!

Secondly, I need to ask a small favour - I've been nominated for an Amara Interior Blog Awards for Best Design Inspiration Blog, but i need your votes to get shortlisted! If you have one moment to pop over and cast your vote I would be ever so grateful! 

CAST YOUR VOTE! 

xxx


July: a Month of Lovely

Argh! Once again I'm super late with this post! I need to catch up on myself! So actually some of these things are from August rather than July! Perhaps I'll take a month off and restart in October... There is now over 7K images under the #amonthoflovely tag on IG, wonderful! Anyway, on to what has made my month lovely...

P8170788CROPLO.jpg

Writing for In The Moment magazine - I mentioned last month that I am now the Living columnist for In The Moment magazine, which I am so chuffed about! In the current issue I'm talking about impromptu picnics and how to use things from your home to create a beautiful garden or park picnic at a moments notice. I'm also writing some other features for them, and this one above is in the current issue, where I talked to Niki of My Scandinavian Home blog about her favourite space at home where she goes to relax. I love Niki's blog and books, so it was great to find out more about her home. Have you checked out this new mag yet? It's a really nice read. 

New e-zine from 91 Magazine - In other work-related news, we've just launched a new product under the 91 Magazine brand, which is free! It is a 12 page digi-mag available exclusively to our mailing list subscribers. It'll be publishing on a quarterly basis, and is a little treat for our readers to enjoy in between our print editions. The first one published this week and focusses on plants and seasonal produce and includes a printable seasonal calendar. Don't worry if you aren't a subscriber yet,, you can still get it if you register your email here

Weekend in Bristol - My hubby's work pattern changed recently, which means he sometimes has time off in the week but is away a bit more too. He recently had to work in Bristol, and as I've been busting to go there for ages, we decided to go up and meet him and stay a night in an Airbnb. We had such a lovely time, it really is a great city - and of course I had to make the trip to Papersmiths and Mon Pote (who both stock 91 - although both were sold out during our visit!) You can't really leave either shop without a purchase or two, so above you'll see the lovely stationery bits I picked up in Papersmiths.

Exploring London - We've also been getting out and about back at home. Since moving house, we realised our train connections to South East London are really quite good, and as this is one area of London we don't really know, I've been trying to explore it a little. We took a trip up to Crystal Palace recently, where Ruby enjoyed the park with the dinosaurs, and I enjoyed checking out the shops around the Triangle. I bought the little fern pictured here in The Secret Garden, which has a great selection of house plants as well as garden plants. I also bought a String of Pearls, which I now need to find a lovely hanging planter for....

Decorating Ruby's bedroom - Our current decorating project is Ruby's bedroom, which has taken a bit longer than I'd hoped. (doesn't it always?!) We had to have it plastered, and then paint the walls, ceiling and floor, as well as hang some wallpaper. We are now just waiting for her new bed to arrive, so in the meantime I've been gathering a few bits and bobs to style it with. I got this lovely minty bedding with shells from Urban Outfitters sale, which was only £18, and the little panda money box was a purchase from our trip to Crystal Palace. I can't wait to show you it when it's all finished and she can finally get back into her bedroom! 

A little garden project - Even while we are doing a room, I'm always thinking (or half working on!) another project in the house! There was actually a wooden play house in the garden when we moved in and my hubby has painted it all, and we discovered it also has a little sandpit underneath. The cover on the sandpit is pretty horrible, so I've decided to make a new one with some plywood, and the plan is to stencil some kind of colourful design on it - I'm just trying to work out the colour palette at the moment, hence the colour cards! 

So, that's what I've been up to lately! A jumble of work, getting out and about and decorating projects! I'd love to see what you've been up to, so keep sharing your pics with #amonthoflovely xxx

24 hours in Bristol with my new camera: Olympus Pen E-PL8

Recently I decided to take the plunge and upgrade my camera. For years I'd been using an old second hand Nikon D70, which is a good camera, but it is heavy and cumbersome and I always felt I wasn't quite getting the results I wanted from it. The fact it is so large and heavy meant I very rarely took it out, and even at events like family parties it felt too 'in your face' and people tend to clam up when you pull out a 'big camera' like that. 

I had recently started listening to Stylonylon's Phototalk podcast where Julia talks a lot about her Olympus cameras, including the Olympus Pen E-PL8, and it sounded exactly like what I was looking for. From what Julia was saying I quickly realised that if I bought this camera it was definitely worth buying an additional lens for it, as she suggested the kit lens that comes with it isn't that great. Her recommendations were either the 45mm or the 17mm lens (or both!). So off I trotted to my local John Lewis to have a play with the camera and the lenses. Straight away I knew the 17mm was the one for me (of course it would be the more expensive one!). With the 45mm you have to be quite far back from your subject which doesn't really suit my style of shooting. After testing the camera out and a good old chat with the JL staff, I went ahead and took the plunge. The camera with the kit lens is £550. They didn't have the 17mm lens in stock, so I decided to look elsewhere for that, and found one on eBay, for about £70 cheaper than the high street price tag of £369.  

LEFT: Taken with kit lens at max aperture of f3.5 RIGHT: Taken with 17mm lens at f1.8

LEFT: Taken with kit lens at max aperture of f3.5 RIGHT: Taken with 17mm lens at f1.8

I had a few days between buying the camera and receiving the new lens from the eBay seller, so spent some time testing it out with the kit lens. When the 17mm arrived, I was overjoyed! The difference was huge and I totally agree with Julia that it is worth adding this to your kit. Above I've tried to take the same shot with both lenses, and you can see the difference in the depth of field, which is down to the fact the kit lens only has a max aperture of f3.5 while the 17mm opens to f1.8. So, ever since, I have yet to take off the 17mm lens, there just doesn't seem any reason to switch back to the kit lens. 

Above is one of the first photos I took with the 17mm lens, as I played around with it at home when it arrived. It's made me enjoy photographing Ruby even more now, when I can get her to stay still for 5 secs that is! 

Technology really has moved on since my last camera purchase, and I was so excited by some of the features the Pen has. If you download the Olympus Image Share app you can do some use it as a remote control. So for the image above I had the camera set up on a surface, and then on my phone I could see what the camera was seeing and I could then release the shutter via my phone! I'm not one for taking many self portraits anyway, but it is such a handy feature and great if you do take outfit shots or self portraits. 

Not only that, you can transfer images directly from the camera to your phone using the app, which I have used SO much. Obviously this is great for uploading pics straight to your social media, but also for sending to family or friends, rather than waiting til you get home to download them all. Another fave feature is the fact you can change format from normal (4:3) to square (1:1). Sometimes if I'm photographing for Instagram, I find it much easier to view in square than having to think about the crop afterwards, so this is super handy. That's why you'll notice a difference in the format of the images here as I keep jumping between the two!

P7280575.JPG

We recently went on a little family trip to Bristol and it was the first time I'd really got to properly try the camera out. Of course it's size made such a difference, you barely even notice it in your bag or on your shoulder. With my Nikon, I'd so often take it away on trips, but then not bother to take it out and about as it was just too heavy to lug around all day. And of course, the fact I could send images direct to my phone meant I could share moments from our day on Instagram without waiting to download them - or like I used to do, having to take the same photos on my phone! So, here's a little photo story of our 24 hours spent in Bristol when my new camera got a really good airing....

P7280557.JPG

We stayed in a really gorgeous Airbnb apartment in the Gloucester Road area, which was just a bus ride into the centre of Bristol with lots of lovely cafes and restaurants nearby. 

On our first afternoon, I stumbled across new candle shop Osmology when we were exploring the Christmas Steps. I had recently heard of them online but hadn't realised the shop was there. It is beautiful and filled with so many of my favourite candle brands. I'm not sure why I didn't treat myself to a candle, I think I was too busy taking photos!

P7290600.JPG

That evening we headed down to Wapping Wharf for dinner, which is lovely, but unfortunately it was raining so I didn't really bother with taking photos, so this is from Saturday morning, when we headed down to Clifton. 

Papersmiths was a must-visit of course - totally dreamy as expected! And then we popped across the street into Anna Cake Couture for hot drinks and macarons...

We then headed back over the suspension bridge to the car and headed to our last shopping stop - Mon Pote. Another shop I've been dying to visit and it didn't disappoint! After a mooch around Up Fest (the street art festival that was on) and a messy burger from a van, we bundled back into the car and drove back to London, just as the rain came on again! 

DSC_4901.JPG

BTW - This post is in no way a sponsored post (I wish!) - I've just had lot of questions about my new camera so thought it would be useful to share my review of it. Also, I had loads of pics of Bristol that I didn't want to leave languishing on my computer forever! I loved Bristol by the way, I can't wait to go back!

 If you've got any questions about the camera at all, just drop me a line. I found it really useful listening to Stylonnylon's podcasts and also watching Emily Quinton's videos about it. Bye for now! 

Editor's Life: How to pitch your feature ideas

In this month's Editor's Life post, I am sharing some practical tips for anyone who is interested in becoming a 91 Magazine contributor, or would like to pitch an idea for a feature, but isn't sure how. All magazines work differently and all editor's will manage their contributors and submissions differently, so this is really a little bit of a guide to how we do it here at 91.... 

NOTE: This guide is for individuals wishing to contribute editorial content - writers, photographers, stylists, illustrators etc. It is not for brands or PR agencies. We do love working with brands though, but you are best to check out our WORKING WITH BRANDS page.

1. KNOW THE MAGAZINE - It may seem hard to believe, but I occasionally get emails from people who want to contribute, but have clearly never laid eyes on the magazine, apart from possibly spotting a pic of it on Instagram! Before even thinking of ideas to pitch, make sure you know the magazine really well. Most magazines will have a loose structure that they adhere to each issue, so you'll be able to see a pattern for the regular features, and for the types of topics and style of article they run. The majority of 91 Magazine focusses on spaces - homes, shops, cafes, restaurants, creative workspaces etc. - so for example, it is unlikely we will run a feature solely on an online business, although if the owner has a lovely home, this could work for a home tour. If you have a great idea but not sure it would fit in the magazine, then perhaps suggest it might suit our blog instead. (Again, make sure to get to know the blog content too!) 

2. PLAN AHEAD - All magazines work quite far in advance, most are putting together their Christmas editions in the summer. At 91, we publish two print editions a year - S/S and A/W. S/S publishes in April and A/W in October. That means, that we are planning each issue at least 6 months in advance. So for example, if you are interested in contributing to our S/S issue, then you would need to start thinking about submitting ideas for this in the Autumn, as we will have our editorial meeting to plan the content in October. 

3. JOIN OUR MAILING LISTS - We have a contributors mailing list, and this is how I contact our contributors as a group to let them know when we are looking for content, when we are looking for a contributor to cover an event or shoot something, and generally keep you abreast of the projects we are planning etc. If you are keen to be added to this, then please email me (caroline@91magazine.co.uk) and tell me a little bit about your work, with links to it ideally. It's also worth being on our general mailing list, as this goes out once a month and keeps you in the loop about what kind of content we are sharing on our blog, when our new issues arrive etc. You can register your email address for that here.

4. CONSIDER PITCHING FOR OUR OTHER PLATFORMS - As we only publish the print magazine twice a year, it is worth considering contributing to our other ongoing platforms, so that we can work together regularly. We currently post on the 91 Magazine blog twice a week, so there are lots of opportunities to write guest posts. We can only offer a minimal fee for blog posts, generally just to cover minor expenses, but it is a good idea to start with this, as it helps for us to get to know your work, and we are then more likely to be comfortable commissioning you for the magazine. We also publish a quarterly e-zine - Seek Inspire Create by 91 Magazine - which is a 12 page digital magazine, which is free for our mailing lists subscribers. (Another good reason to sign up!) This publishes in Aug, Nov, Feb and May. We do pay a small fee for print magazine features and a very small fee for the e-zine, but we are always striving to grow the magazine and increase fees over time. 

5. FOLLOW AND ENGAGE ON SOCIAL - It always helps to engage socially first as we will then potentially know of you and your work before you get in touch. This is absolutely not mandatory, and you certainly won't get priority this way, but it is definitely nice to engage and chat like this. You can find 91 on Instagram, Facebook, Twitter and Pinterest.

6. WRITE A SHORT SYNOPSIS / PROVIDE VISUALS - Once you are ready to submit your ideas, the first thing to do is find out who you are emailing and address them by name! This should be easy if you have done point no. 1 here! It's a small detail, but does make a difference. Then simply introduce yourself if you haven't already (including links to your work) and then write a short paragraph about the idea/s you've got. 

  • Writers - you may have an idea but don't have professionally shot photographs. That is totally fine, but it is ideal if you can provide some kind of visuals, whether they are snapshots, a link to images online, or an Instagram page etc. Great photography is paramount for us, so it's worth considering whether it's a space that we might be able to arrange to shoot.

  • Photographers - If you've got a shoot you'd like to share then low res files or a PDF initially is fine, along with some details of the space. If you'd like to pitch a space to shoot that is great, but again, it would be ideal if you can give us some visuals to look at to see if it will be suitable.

  • Stylists - We use stylists for a few of our magazine features, either working on our brand collaborations, or producing a styled story shoot. You can either put yourself forward for these, or you can submit a story idea - this might be trend led, or diy/craft ideas etc.

  • Illustrators - It's slightly different for illustrators as you are not generally pitching an idea. Please do just get in touch with a link to your work, and we will be in touch if your style suits one of the features that we commission illustration for. Let us know if you want to go on the contributors mailing list.

7. DON'T BE DISHEARTENED - Please don't get disheartened if your first idea is not accepted. Sometimes we may have already ran a similar feature, or it's just not the right fit. Do feel free to submit more ideas and hopefully we can find the right thing to work on together. 

I hope that is helpful to anyone who has perhaps been thinking of getting in touch about contributing but has been nervous or unsure how to go about it. If you have any questions about anything I haven't covered here, feel free to comment or drop me an email, I promise I am not a scary 'Devil Wears Prada' editor! :) 

June: A Month of Lovely

How's your month been folks? I feel like these monthly posts are really highlighting to me how quickly time whizzes past! I'm getting later and later with them each month! I hope you've had a good few weeks - I've been so enjoying seeing your pics on the gallery on Instagram - there is currently over 5.5K images under #amonthoflovely! Thank you for sharing and tagging your lovely moments. So, here are mine from the month of June....

New camera love - I recently decided that it was time to invest in a new camera. I've been using a Nikon DSLR for years and I had started to feel it just wasn't giving me the kinds of images I wanted to create, plus the technology was pretty old compared to what is on the market now. So I've taken the plunge and bought the Olympus Pen ELP-8. I also got the 17mm lens from eBay which is definitely a game changer. I will write a post about why I'm loving this camera so much soon, but for now, you can see some of the images I've taken on it on my Instagram feed

Handwritten cards - I LOVE a handwritten card. As much as you can say the same thing in an email, it is so much nicer when it comes inside a pretty card. It was our 4th wedding anniversary in June, so hubby gave me the 'you shine like a star' card, and I received the other floral card from Libby at &Hobbs. You may have seen we featured &Hobbs in our Talking Shop feature in the current issue of 91 Magazine? I've met Libby a few times now when I've visited the shop in Shere, and she is SO lovely - and on my last visit she gave me this lovely card to say thanks for the feature. Such a lovely gesture. 

New writing work - I'm so excited to share the news that I am now a magazine columnist! A while back I was asked by the editor of a soon-to-launch magazine if I would like to write their 'Living' column, and I of course was totally honoured to take up the position! The first issue launched a few weeks back, so you can now pick up In The Moment magazine in the shops. The focus is mindfulness and well being in all areas of your life - health, creativity, living and travel. It feels like a very down-to-earth, relatable magazine, so do check it out - I'd love to hear what you think! 

Spaces by Frankie Magazine - I was in London last month celebrating our anniversary with the other half, and picked up this gorgeous volume of Spaces while I was there. It is packed full of gorgeous homes to pore over, I'm just waiting for the right time to really get stuck into it! I would SO love to do something similar to this with 91 Magazine - what do you think?! 

Come on over to Instagram and say hi - I'm @patchworkhrmy and share your lovely moments with #amonthoflovely. x

#mynestandburrow - get involved!

I don't know about you, but I'm always on the look out for new hashtags to use on my Instagram feed. It's a great way for your images to get seen by new people and also a fun way to interact with the creative community on there. I recently came across the #mynestandburrow tag, run by Suzanne of Nest and Burrow. Suzanne creates some amazing woven wall hangings to decorate your home with, and she started this hashtag recently to get folk sharing images of their homes (or nest!) with the incentive of winning a lovely prize.

Photos by @nestandburrowuk

Suzanne explains: '#mynestandburrow is about the way you lovingly create spaces in your home {nesting} and the resulting magic that provides a nourishing environment for you and your family’s wellbeing. It’s about being inspired by nature, bringing the outdoors in, light, natural materials, as well as a strong interior design ethic that says You!

Use the tag to share your favourite spaces and pockets of your home. The cherished places where you entertain, spend time with family and friends, meditate, create, cook, sleep....or simply just be.'

photo via Ruby Cubes

photo via Ruby Cubes

I really enjoyed getting involved in the last challenge, and was so thrilled that Suzanne contacted me to ask if I'd like to be a guest judge on the next one! absolutely I said! For this challenge you can win a lovely hanging planter by Ruby Cubes, simply by sharing your pics. Well, there's a few little rules for entering which are below! So read on....

The theme for this next challenge is 'Summer'. Share pics of how you've been bringing elements of summer into your interiors, that enable you to enjoy your home to the full in this special season. Plus, don't forget your gardens and their connection to your home. It could even be somewhere you're staying for a summer holiday and that you just love!

To enter simply follow the three of us:  @nestandburrowuk @patchworkhrmy and @ruby_cubes_exeter and tag your pictures of your summer. You have two weeks to enter! 

Something as simple as bringing in a few summer blooms from the garden to display or the early evening light streaming through your window, or simply a spot that you love to sit during the summer months, soaking up the warmth and the longer, lighter days. So get involved folks, I can't wait to see your images and pick a winner! Good Luck! x

An en-suite bathroom in the loft conversion

We are really lucky that our new house came with a ready made loft conversion - although I must admit, it may not be how I would have configured it if we had have been doing it ourselves, but hey, beggars can't be choosers. We've got a decent sized master bedroom which you can get a peek of here, and then there was another small room off the landing which was kind of an office space when we moved in. We knew straight away that it would be the perfect space for an en-suite, and having a bathroom on the same level as our bedroom felt like a bit of a necessity for those middle of the night, half asleep, toilet trips! 

P7060070.JPG

As always, with any renovation project, things aren't as straightforward as they seem, and when we started talking to our builder about it, we discovered that because of the positioning of the room it would be a bit more complicated. Basically the room is at the front of the house while the soil stack is at the back. This meant that we would need a macerator. I'd never heard of this before - it's a system that compresses all the waste, sends it through a much narrower pipe than usual, and then directs it to the soil stack - delightful! It wasn't ideal, as I'd read a little about the potential for things going wrong with them, but we decided it wasn't a reason to not do the en suite, so went ahead with it. (and so far so good!)

It then transpired that if we wanted the sink to supply hot water, we'd also need a kind of mini hot water heater fitted under the sink. I had originally planned to have a wall mounted basin, but we were advised to have a cupboard under the sink to house the heater. This, of course, sent me on a sourcing mission to find a beautiful cupboard that we could adapt to fit the sink, rather than those horrible, under sink cupboards you get in the bathroom shops! After a bit of a search, I discovered this one on fab vintage website Goose Home and Garden. We travelled down to the south coast to pick it up, just about fitting it in the car! When we got it home & put the sink on top, it was a tiny bit too high for me, so my builder had to cut the feet off it to make it the perfect height! 

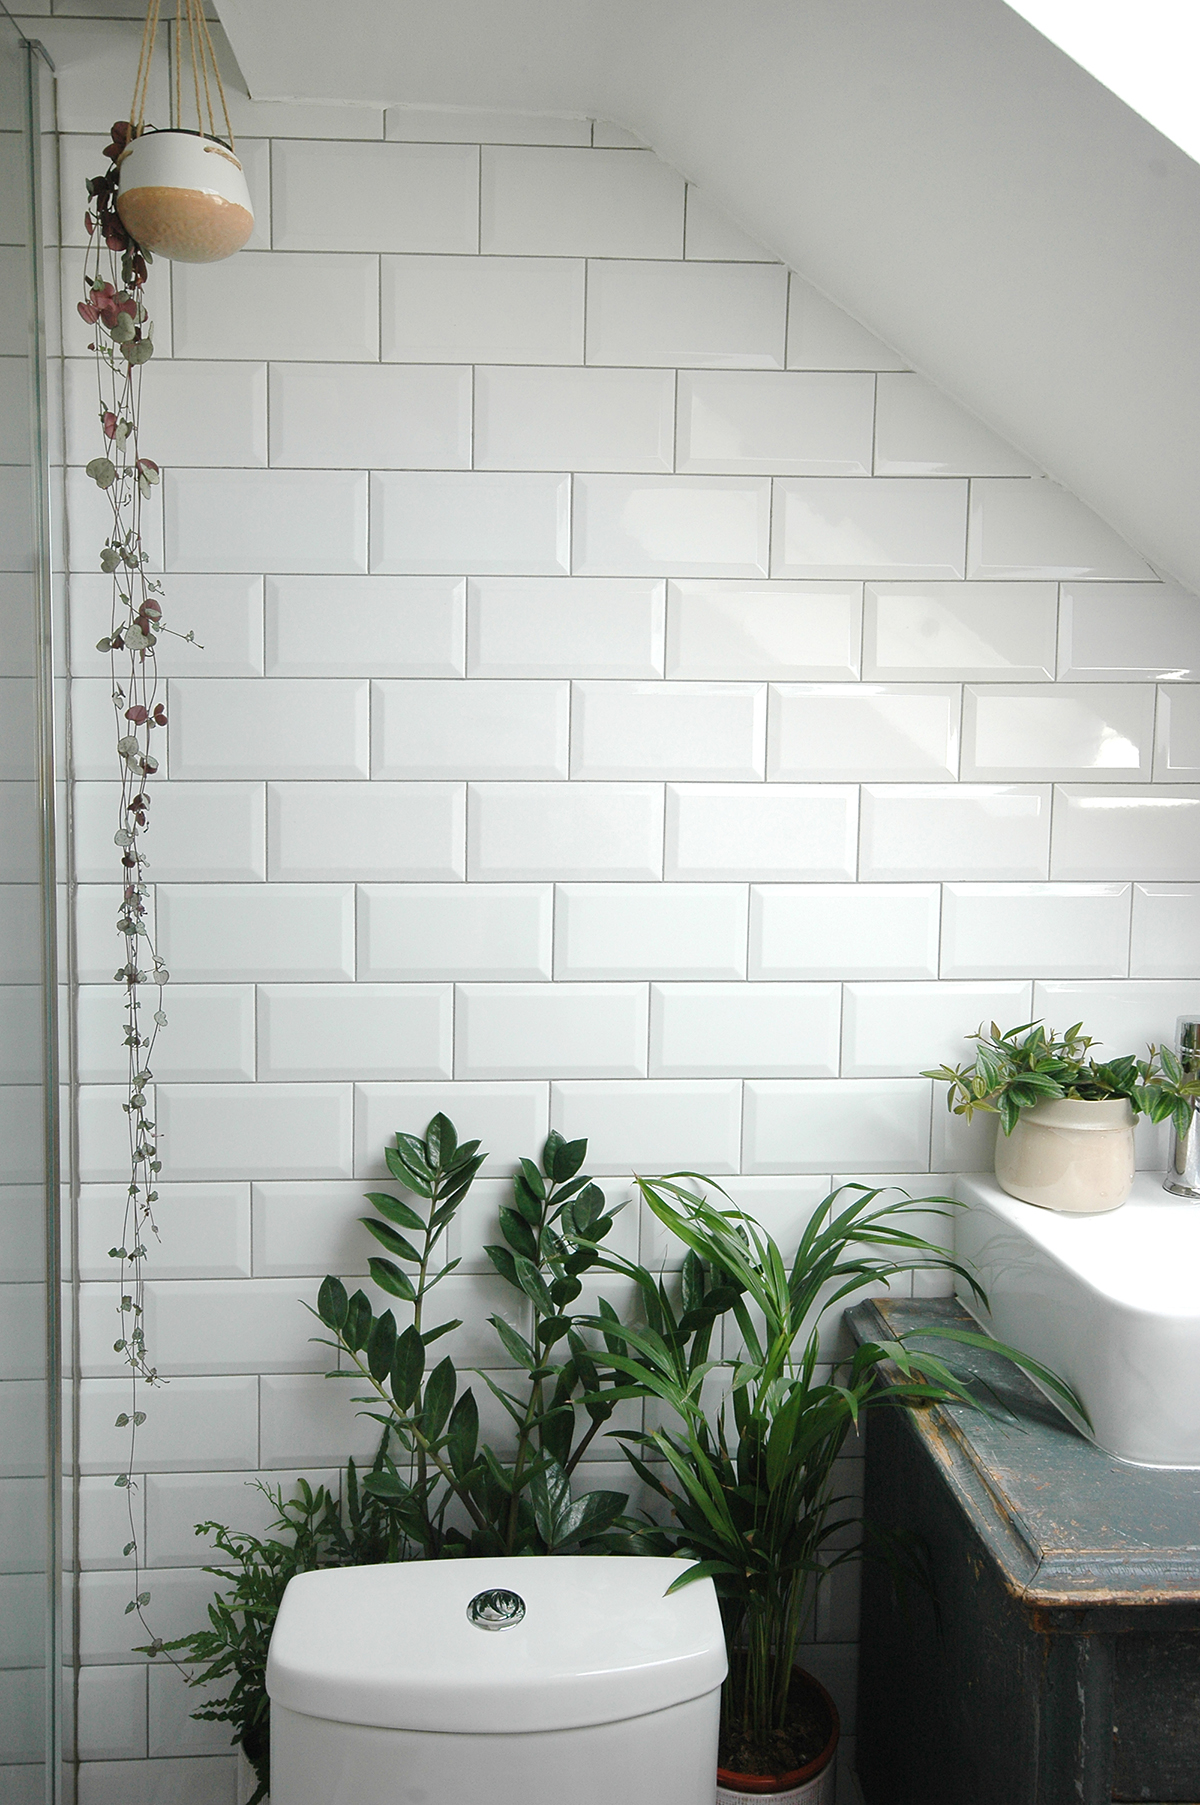
When it comes to tiles, I always like to try and find something a little bit different - and I totally fell in love with these floor tiles from Baked Tile Co. It is from their 'Urban' collection and has a chipboard effect. They have lots of designs available and there are various ways you can configure them to create different looks. I actually had planned to tile the walls in these also (in the plain version) but sadly it was working out a bit out of our budget, so we opted for the white metro tiles from Wickes, which you can never really go wrong with. 

I ordered all the bathroom fittings online - the shower came from soak.com and the toilet and sink from Taps UK. Once the bathroom was installed, I set to work putting the finishing touches to the room. I wanted to keep it pretty simple as it's a small area, but wanted it to feel inviting and a little bit tropical! We have a boxed in section behind the toilet (where the macerator is housed) so to detract from the big space behind the loo, I added a selection of plants. I picked up all of these plants at Homebase (bar the string of hearts) and added a little peperomia on the sink and a calathea on the floor. 

I quite recently discovered a gorgeous online shop called Lilac Coast, who stock lots of lovely homeware, and in particular some gorgeous plant pots. Both of these are from their range. Their earthy tones tie in nicely with the floor tiles.

I've had my eye on this whale print for ages, but until now hadn't had a place for it. It came from another lovely online shop - Grey September - and the laundry basket I picked up from Deco Baby

I'd love to hear what you think of it! I'm really happy with it, and so chuffed to finally have an en suite! Oh, and I couldn't leave without giving you a peek at how the room looked pre-renovation! See below. ;) 

DSC_3910.JPG

Living room play space - reveal

A while ago I wrote a post about creating a play space in your living room that is not only fun for your child but also blends with your decor and doesn't just look like you have a creche in the corner of the room. I recently put the finishing touches to the space I created for Ruby, and this is the last area of the living room to show you - you can see the rest of the room here and here.

I went with mainly neutral colours - black, white and beige with a few pastel colours thrown in. It's often tricky with kids as they are naturally drawn to bold, garish colours, and of course Ruby does have lots of these toys, but I've added baskets and the Ikea PS cabinet so that these can be tidied away after play time. 

DSC_4660_1200.jpg

She got the John Lewis play kitchen for Christmas last year - again I opted for the neutral design - although I'm sure she may have preferred a hot pink one, but hey, parents rights! There are so many gorgeous products for kids these days that there is no need to end up filling your home with plastic tat, particularly when it will be in your living room! Ruby loves this little table and stool from Nubie (I think I may love it even more!) Yes, it is a bit more pricey than others I looked at, but it is really sturdy and will grow with her. The rug is by Ferm Living (I bought via Trouva) and just breaks up the floor space a little. 

In the little alcove next to the fireplace I created a reading nook for her. This gorgeous bean bag from This Modern Life, fits seamlessly into the space and is super comfy - she often drags it over to watch telly on too. I've just used a wooden crate on its side for storing some books and the owl planter I picked up in Homebase

This Modern Life is one of my fave online stores for kids decor, toys and gifts. The little fox container is perfect for colouring pencils or crayons, or perhaps for a plant. And how beautiful is this memory game by Ferm Living?! Really lovely gifts too, don't you think?

We added this large mirror from One World to try and help reflect a bit of light into this corner as it can sometimes be a little dark. The dolls house is actually Ruby's 3rd birthday gift which is in a few weeks, so I need to hide it again! I found it on eBay for £40. I love it's simplicity and the pink details should keep Ruby happy! The little pink picnic basket came from Deco Baby (we went to their pop up shop at &Hobbs in Shere recently - it's on until 2nd July, and is well worth a visit if you can!) The sleepy bear storage bag is great for those tiny toys kids seem to accumulate & is super cute. (I think I got that from Tea and Kate ages ago) 

As I've mentioned storage baskets are essential. They are easy to move around and you can chuck everything in at the end of the day. These ones are from Oliver Bonas and are perfect for things like Lego, and fit right under the Ikea cabinet. The tall bag in the corner is from Hema, and again so handy for throwing everything in to. 

DSC_4678_1200.jpg

So there you have it! I'd love to hear what you think.... here are a few more images and sources of anything I didn't mention above. 

Acrylic play sign - LaLa Loves Decor / Cat fabric banner - Olive Loves Alfie / Bear Alphabet print - Corby Tindersticks / Welcome to the Circus print by Seventy Tree - Deco Baby / Cast iron radiator - Castrads

Acrylic play sign - LaLa Loves Decor / Cat fabric banner - Olive Loves Alfie / Bear Alphabet print - Corby Tindersticks / Welcome to the Circus print by Seventy Tree - Deco Baby / Cast iron radiator - Castrads

Editor's Life: Behind the Scenes on photoshoot day

Through the series of Editor's Life posts, I want to give a little insight into my life as editor of 91 Magazine. You can catch up on the full story of how the magazine started and evolved here, but today I thought I'd give you a little look behind the scenes on one of our home tour photo shoots. 

Generally, I don't get to go on many of the shoots due to juggling childcare and my other work, but when I can, I do try to get to some. For our current issue we shot the home of Colleen Larmour, owner of Little Carousel, a children's toy and decor brand. I actually went to art college with Colleen many years ago, and she lives very close to where I grew up in Northern Ireland. 

I commissioned photographer Jemma Watts for the shoot, and we travelled over to Belfast back in March (nearly missing our flight as we nattered away in departures!) 

Jemma had viewed some snaps of Colleen's home before the shoot, but otherwise she had not seen the space before. So the first thing we did when we arrived early that morning was to have a walk around the house and work out what order to shoot the rooms in, dictated by where the light is throughout the day.

With the light at the front of the house, we started off in the bedroom. Generally, I prefer not to change too much about how the homeowner has styled the space, but because we have to consider when the issue will publish we have to think about the seasonality of the images. So for example, here Colleen had a fur coat hanging on the wall, which looked great - but we decided to swap it for this bright yellow vintage dress, which looked beautiful next to the daffodils and tulips - and much more suited for our S/S publication date. 

There's a lot of standing on chairs (sorry Colleen!) and squeezing into corners to get the angle of the shot just right, so there's often a lot of furniture moving involved. When it comes to styling, as I say, I like to keep this to a minimum, but it's sometimes just a case of a tiny tweak, like removing a cushion, or rotating a plant that makes all the difference to the shot. Before moving on to the next room, we'll have a check through the images that have been taken so far, to make sure we're happy we've got everything to represent that room. 

Occasionally problems arise which you need to solve quickly otherwise it will hold the whole shoot up. For example, in the snug area we had to adjust the height of this (amazing!) light fitting to get the composition just right for the shot. While something like this can look totally fine in 'real life', when you line up an image in the viewfinder on the camera it sometimes just doesn't work, so little tweaks like this make all the difference. 

Here's an example of the awkward positions photographers have to get into to get the shot... While in the background Colleen prepares the kitchen for it's close up!

After a quick refuel, we crack on shooting Colleen's studio and her portraits. Jemma positioned Colleen at her sewing desk next to the window so she could get some soft natural light on her face. There is often much hilarity while shooting portraits, as we try to make the subject laugh to get some natural smiling shots! I think Colleen and I were ribbing each other about old college day crushes!

I think sometimes the perception of a magazine photoshoot is that it's kind of glamourous and cool, but I'm sure even some of the top fashion models will agree, it is seriously hard work both physically and mentally. It is a long day and there is often a lot of pressure to make sure you get all the shots you need before the light fades. For me though, there is nothing that feeds my creative soul more than working alongside a great photographer, bringing together the images for a feature like this. It's so exciting to see the story take shape.

Photo by Colleen Larmour

Photo by Colleen Larmour

If you haven't seen the mag with this lovely home tour in it yet, then make sure to order yours before they sell out. Do pop over and check out Colleen's colourful Instagram feed and shop too!

If there is anything else about the magazine you'd like to hear about in these posts then do leave me a comment, I'd love to know what might be of interest! x

All photos: Caroline Rowland

May: A Month of Lovely

We are half way through the year already, and I am really trying to savour these months as much as possible. While we might not be getting the wall to wall sunshine that we hope for every summer, we've had some great days of weather here and there, and even when it's not that sunny, I still enjoy the longer days of light, so much better for taking photos! We had a week away in France, where the weather was also mixed, but even when it poured for a whole day, I spent the time relaxing indoors, watching films and napping - which I literally NEVER do! So here's the things that have made my month lovely.... don't forget to share yours too online with #amonthoflovely

Reading actual books - I've had a Kindle for a few years now, and I do love the handiness of it, but when it comes to beautiful lifestyle books nothing compares to the real thing. I recently received a selection of books to review on the blog and I've so enjoyed sitting down with a cuppa and flicking through the pages. I'm particularly enjoying this one A Year Between Friends, isn't the cover just gorgeous?! If you are looking for some great books to add to your reading list, do check out the summer books post.

Printing actual photos - There's a theme developing here ('scuse the pun!) of enjoying things in analogue rather than digitally! I definitely don't do enough of this. I take pictures on my phone nearly every single day, and while many make it onto Instagram or Facebook, many just languish on my phone never seeing the light of day. It's fair to say it is the best shots that make it on to social media, and as I do look at my Instagram feed numerous times a day, I guess I do 'look' at the pictures regularly, but I think it is nice to actually print your favourites and dot them around your home. You don't even need to frame them, simply tacking them up with washi tape is a relaxed, fun way to display your faves, and you can change them as and when you feel like it. It's SO easy to print these days too, I generally use an app like Printic, where you can order directly from your phone.

Shopping indie - The power of social media really is tremendous when it comes to discovering new things, whether that's creative people, small businesses, restaurants or travel destinations. Everyone has there own reasons and ways of using the likes of Instagram, but one of my favourite things is finding new independent shops and designers to shop with. One such store I recently started following is Lilac Coast. It's a gorgeous online shop based in Dorset and Alice not only has a beautiful IG feed, she stocks some really lovely things for the home. She recently posted a pic of this little ceramic planter and I HAD to have it! I knew it would be perfect for my string of hearts plant. Check out the website, you'll be sure to fall in love with something too!

Rediscovering my love of flea markets - I've mentioned before on the blog how my style has been evolving of late and I've been buying more contemporary items for my home. I wasn't sure if that meant that my love for vintage had disappeared or not. But during our holiday in France last week, we visited quite a big brocante, and I quickly realised the thrill of the vintage hunt is still within me! What I discovered though, is that I am now much more considered and restrained than I used to be. This time, I had in mind what I was looking for (great plant pots and pink or yellow items) so I managed to bypass items that previously I would've jumped on just because they were super cheap. In the end, I came away with just three things - this yellow tin, a peach coloured plant pot (nearly pink!) and a poster with bird illustrations. I know, I know, the poster didn't fit within my criteria, but it was beautiful, in perfect condition and only €20!! 

Growing peonies - I think peonies may be a staple in my summer 'month of lovely' posts! I know I mentioned my coral favourites in the April round up, but I was thrilled to find these gorgeous white ones had come into bloom in our garden when we got back from holiday! It's typical that they were obviously at their pinnacle while we were away, but I quickly snipped this one to bring indoors to enjoy while I work. I can't take the credit for growing these, as the plants were here when we moved in, but I definitely think I'd like to try and plant a few more for next summer, it would certainly save money on buying them during the season each year! 

That's it for this month, I do hope you enjoy these posts and the little peek into what I've been enjoying in my life lately. Do pop over and say hi on Instagram (I'm @patchworkhrmy) and join in with the project. #amonthoflovely

A flower filled home - inspired by Chelsea Flower Show

Back when I worked for FT Weekend for five years, this time of year always meant Chelsea Flower Show for me. We did a lot of coverage of the show, and even did a special supplement on the event. I did a lot of sourcing images of the show as well as commissioning photographers to shoot at it. But never did I get to make a visit myself. So, unsurprisingly, I was thrilled when I was invited along this year by Marks and Spencer! I was finally getting to see all of those stands and gardens designed by the experts with my own eyes, and indulge in one of my favourite things - photographing flowers. 

Marks and Spencer's Spirit of Summer display (pictured above) was absolutely stunning. I spent ages snapping the fountain of blue, purple and green flowers with pops of pink, and the walls laden with vibrant blooms in the colours of summer. 

I didn't get as much time at the show as I'd have liked. I had an afternoon ticket, so had to whizz back to collect the little 'un, but after visiting M&S, I had a quick browse of some of the other stands, and was inevitably drawn to peonies and anything a little bit wild. And from my pics above, it's clear my pink obsession continues! While my trip was a bit of whirlwind, there's no doubt that it filled me up with floral inspiration, and coming home, I *needed* to surround myself with blooms in every room!

Filling your home with flowers sounds extravagant, but actually if you are savvy it's quite easy to add a bit of a floral touch to almost every room. The best way I find to do this is to mix and match a couple of bouquets, and you can even add in a few of the cheaper little bunches such as gypsophila and alstroemeria. Splitting up a larger bouquet into lots of smaller vessels, rather than just putting it all in to one big vase, gives the chance to spread the floral love around your space...

Gathering a range of vessels in different shapes and sizes will help to determine the size of the posies you create, so some will need a good bunch to fill it, while others, like little vintage bottles, look great with just one or two stems....

I am by no means a good flower arranger, but I really enjoy playing with flowers in this way, and the more you do it, the better you'll get. The above arrangement was the first time I've ever tried using wet foam bricks. The vintage bowl I've used wouldn't hold flowers in the usual way, so adding a small piece of florist foam to slide the stems into worked perfectly. 

This little desk vase above is mostly just gypsophila and alstroemeria, with some added foliage from a larger bouquet and a single peony, which, when it blooms, will really fill out the arrangement. 

Any left over foliage and flowers can be popped in a vase together, and makes a lovely wild, yet summery display. You can even bulk out your arrangements with foliage from the garden or hedgerows, and simply buy one bouquet to split. You home will be flower filled in no time! 

Thank you to Marks and Spencer for fulfilling my dream of visiting Chelsea Flower Show (!) and for sponsoring this post. 

Top lifestyle books for Summer

With summer upon us, you may be taking a little bit of time out, so it's the perfect excuse to indulge in some beautiful inspiring books while you kick back. I've gathered a few faves that I definitely think are worth checking out, with varying themes - from Instagram help to modern craft projects to London shopping tips...

A Year Between Friends by Maria Alexandra Vettese & Stephanie Congdon Barnes

I reviewed Maria & Stephanie's first book A Year of Mornings previously and loved it, so was excited to get my hands on their latest offering. A Year Between Friends has a similar feel to their first book - gorgeous every day photography from the lives of two friends, but this time it has a more practical element added in. Recipes, craft ideas and tips on wellbeing flow through the book and the seasonal journey it takes you on. We follow Maria's pregnancy as it progresses, and share in her joy at the birth of her daughter mid way through the book. It is a heart warming read, full of appreciation for domesticity and creativity, and the celebration of true friendship. 

Published by Abrams. Order here.

Sunshine Spaces by Beci Orpin

I'm just loving the cover of Beci Orpin's fourth DIY book, it seems to exude happiness! Once you delve inside, you'll feel totally inspired by the gorgeous photography and fun design too. So, even if you never make any of the projects, it's simply a beautiful book to flick through regardless. BUT, the chances are you will want to make many of Beci's nature inspired ideas, as there are so many great ones! They seem straightforward and all are cool, modern projects - not a twee craft idea in sight! Make a macramé camping chair, a picnic blanket or pet rocks with the kids, all in on-trend Beci Orpin style!

Published by Hardie Grant books. Order here.

Living with Plants by Sophie Lee

I don't know about you, but my plant habit has been escalating lately, with varying levels of success, but I do feel like my plant care skills have improved some what. There's still much to learn though, and this guide by Sophie Lee, owner of Geo Fleur is a good place to start. As well as lots of pretty plant-filled imagery to pore over, Sophie explains how to choose the right plants for your home, takes a closer look at some of the most popular varieties and shares lots of practical tips for caring for your plants. I shall be studying this closely in my quest for houseplant heaven! 

Published by Hardie Grant books. Order here.

The Scandinavian Home by Niki Brantmark

This book is kind of a no-brainer for me. I LOVE Niki's blog My Scandinavian Home - it is jammed packed of some of the most inspiring homes I've ever come across, so a book filled with the same MUST be in my collection! And it certainly doesn't disappoint - I literally want to scrutinise every single page, gleaning ideas that might just make my home as effortlessly chic as the ones featured. It's also made me yearn for a trip to the Nordic countries more than ever, in the hope that some of their natural style will rub off on me! 

Published by Cico Books. Order here.

Read This If You Want To Be Instagram Famous by Henry Carroll

Lastly are two small format books, the first which claims to be your guide into Instagram fame. It's title certainly does grab you if you are as Instagram obsessed as I am! Whether reading it will actually bring you those millions of followers you dream of is yet to be seen, but it is at the very least, an interesting insight into the people who are making it big on the app. Tips from 50 top Instagrammers are interspersed with technical advice on things like composition, using hashtags and how to make money from your feed. It is definitely worth a read if you are having a creative lull and need a inspiration boost, plus you'll discover some ace accounts to follow too. 

Published by Laurence King. Order here.

Shop London by Emma McCarthy

I obviously love any book that's about shopping, particularly when it's about my own city and the independent shops to be discovered there. There's been many of these types of guides published over the years, but they can become outdated as shops close or change, so I like to pick up newer versions like this to see what's new on the retail scene. Saying that, the shops featured in this book aren't necessarily new, but they've been carefully handpicked by Emma (deputy fashion editor of the London Evening Standard), for being the most talked about, tucked away and unique retail spots in the city. It's a must for anyone visiting London, but also for those of us who've lived here for years, but are still discovering its hidden gems. 

Published by Frances Lincoln. Pre Order here.

So, that's what's on my shelves right now, I know I'll be dipping into these books regularly for creative inspiration! What's on your reading list this summer? 

Living room makeover - Part II - features

As you may have read in the first part of our living room transformation, we did quite a bit to the space, so I thought it best to break up the posts up a bit! This time, I thought I'd focus in on the fixed features of the room - the backdrop to the furniture & accessories....

One of the biggest changes to the room was definitely the floor. Below is the 'before' shot again so you can see the carpet that covered the entire room before. It was old, worn, saggy and smelt! 

We decided we wanted the living room flooring to be a big feature in the house, so while it wasn't cheap it will be there for a long time and hopefully should only get better with age. I did consider reclaimed parquet, but after reading up on it, it sounded like it might be a nightmare as the old glue is usually left on the planks, making it more difficult to re-lay. We decided to go for oak parquet made to order, that had a bit of a distressed look in a paler shade of wood. We used a local company to lay it, Surrey Wood Flooring, who sadly, I was quite disappointed with. They started off well, but when it looked like the job was over running, they suddenly sped up and rushed through the finishing. The beading around the edges was terrible (I had it redone, but still a lot of it came away from the skirtings and we've had to re-stick it ourselves.) Anyway, I won't bore you with my complaints, but it's just very frustrating when you spend so much on something only to have lazy workmanship isn't it? Overall, I'm pleased with the floor, but it's those little details that I'm sure no-one else will notice, but I know they are there!

We decided to add an extra radiator in the room as well as replacing one of the old ones. We added this one under the window from Castrads. This is their Grace 6 Column model. Their radiators come in over 60 finishes, including Farrow and Ball and Little Greene colours. We opted for Farrow and Ball in Off Black - it's just gorgeous. It probably sounds weird, but I feel cast iron radiators give a room a bit more credibility, as if it's a bit more grown up.... is that just me?!

At some point the room was two separate rooms, so there is actually two fireplaces in it. We gave both of these a bit of a facelift. I really wish I had a before shot before we painted the walls - the chimney breasts were gold and the rest of the walls dark navy, but you can see how the old tiles looked at least in the before & after above. I repainted the fireplace surrounds in Farrow and Ball Off Black, the same as the radiators to tie these together. It's a really dark navy and is less heavy looking than the previous black paint. Their paint is so lovely to work with I find - easy to apply and gives a beautiful finish. We then replaced the fireplace tiles with these amazing Bert and May glazed tiles. I'm SO in love with them! They look great against the parquet. Below is the other fireplace....

On the wall behind the sofa we put up some Ikea picture ledges. I decided I wanted to be able to change the display here. For example if I change the cushions on the sofa, and could change the display accordingly. It's a really easy way to update the look if I feel like it. 

I'm totally in love with this pouffe from Swoon Editions. Would you believe I actually ordered it when I was in hospital in January! I found internet shopping was the best way to distract myself from my nerves about the imminent surgery. I also knew that Swoon Editions don't have items in stock for long so I HAD to snap it up! They don't have them anymore, but it's worth keeping an eye out as they sometimes get items back in stock....

The final addition to the room was some alcove shelving. Our new favourite thing is going to Homebase and getting wood cut to size! ha! Such a handy free service, and saves us a job! So I think these shelves cost us about £10, and I'm really loving their simplicity. I'm trying to keep them uncluttered in my quest for a more pared back look.

So that's that. In the final post I will be showing you the last corner of the room which is Ruby's little play area which we are just finishing off at the moment. Stay tuned! 

**Thanks goes to Castrads, Farrow and Ball and Bert and May for helping out with our makeover."" 

April: A Month of Lovely

Wow, another month has whizzed by! This year is going ridiculously fast. Since my last A Month of Lovely post, the fab Sara of Me and Orla included the hashtag in her newsletter round up of hashtags you should be using, which has given the tag a massive boost on the number of people using it. Thank you Sara! Hashtags are a funny old thing though, people using them don't necessarily know where they originated from, so if you do use it, feel free to tag me in too, so others might pop along here and find out more about the idea behind it. :) 

Anyway, onto my own Month of Lovely....

Recording my first ever podcast interview - I started getting really into podcasts about 2-3 months ago. There are lots of amazing creative business ones popping up, and I've found they are particularly great to listen to while you are decorating - you can totally focus on the conversation while painting a wall! I've listened to Sara's Hashtag Authentic episodes, lots of A Playful Day's old ones and I had recently started listening to Style Matters by stateside bloggers Zandra and Karen. So I was thrilled (yet scared!) when the ladies emailed me and asked if I wanted to be one of their guests to chat about 91 Magazine, Patchwork Harmony and my book. It is now available to listen to here, or just look them up on your podcast app. 

The latest issue of 91 Magazine - It's always a nerve-wracking week for me when the magazine goes to print and I await the delivery. This time was our biggest print run to date, so it feels even more worrying - what if something goes wrong?! But thankfully, this time we don't seem to have any major problems, and I'm really happy with the issue. This issue is due to be stocked in 50 WH Smith stores which is a big step for us, so do look out for it in the major train stations and airport shops! If you haven't got your copy yet, you can order direct from our site and I urge you to take a look at the beautiful screen prints by Karolin Schnoor (pictured above) that we are selling with the magazine as a bundle. They are so beautiful, which may be tricky to appreciate from photos, but the paper and the metallic ink they are printed with is just stunning. Pop over to the shop, I promise you won't be disappointed! :) 

Peony season - YES! It's here! I'm yet to tire of these beautiful flowers yet, although I often struggle to justify a purchase as they aren't the cheapest. The other day my lovely mum bought me a bunch of my faves - the coral variety which I had in my wedding bouquet. I love watching them go from closed up spheres, to gradually revealing their yellow interior, to finally fading to palest pink... 

The business of Instagram - It really is unbelievable how much Instagram has changed how people promote their business, gain work and generally live their life. When we have a family outing these days, both me and the hubby are trying to get great shots of Ruby or of wherever we are - to post on our Instagram. I don't think it's a bad thing - we both enjoy taking photos, so why not have an incentive to get better shots? I find the use of the app intriguing, particularly in terms of how some people make a living solely from it. I don't expect to be doing that any time soon, but I did buy this book Capture your Style to start looking more closely at how I use it for business. 91 deputy editor Laura reviewed it over on the 91 blog recently if you fancy a peek. 

Magazines I'm reading - I don't get a lot of time to put my feet up and read other magazines, but I've recently stocked up on some others I enjoy, with the plan to catch up on them soon! Lionheart, Frankie and a new one to me, Project Calm are all piled up next to the bed, ready for a perusal. What mags are you reading at the moment? 

So that's lots of goodness from my past few weeks. What about you? Tag your pics with #amonthoflovely or why not join in with your own blog post too? Find me on Instagram at @patchworkhrmy

Meri Meri at The Hambledon collaboration

It's no secret that I love shopping. My heart skips a beat when I discover and step inside a beautiful new store to explore, and that's exactly what happened when I laid eyes on The Hambledon a few years back. I loved it so much I even featured it on the cover of my book! If I live closer I'm sure I would be in there on a weekly basis. In lieu of this, I enjoy keeping up to date on the goings on at the shop via their website and newsletters, and was recently wow-ed by their current collaboration with super fun party & homeware brand Meri Meri.

I'm such a big fan of creative collaborations, they just seem to make so much sense, bringing together brands that can support each other, and share their customer base. I wanted to find out a little more about this partnership, so had a chat with Victoria, owner of The Hambledon, Maria, one of Meri Meri's visual merchandisers and Stef, Meri Meri's Creative Director's Executive Assistant....

PH: Victoria, Can you tell me a little about the Hambledon project space as a concept? 

Victoria (TH): We have a mezzanine level at the back of the shop which, in the very early days, was our menswear department. When menswear moved to its own floor in the basement we decided to turn the area into a collaborative space. We wanted to work with selected suppliers on a pop up/exhibition basis. It's a kind of fun outreach programme!

PH: I know this isn't the first time you've worked with Meri Meri - but how did you collaborative relationship come about? And how does this project differ from the first one in 2015? 

Victoria (TH): When we first worked with Meri Meri we had already organised a number of Projects with other suppliers (but on fashion and homeware) and Meri Meri gave us the opportunity to showcase a more kid centric area. The first Project focussed more on their party ware. This time around they have just launched a new range of children's bed linen and soft furnishings which is the main emphasis for us but we're still selling a lot of the smaller pieces (we can never have enough tattoos and patches and pins!).

PH: Stef and Maria - What is it you love about the Hambledon shop and the space? 

Maria (MM): Walking down the cobbled side passage to find this little treasure trove is a lovely, unexpected surprise. It's such a beautifully curated space, which is so thoughtfully edited, making for a very enjoyable, shopping experience. It feels a little bit more like you're walking into someone's home rather than a retail shop. 

Stef (MM): The people! The Hambledon staff are so lovely and make us feel right at home. They have a great space but what makes it is their products; there is careful thought that goes into the selection and merchandising. They have a formula that works and it keeps the customers continuously coming back for more. The Hambledon give us free reign with the space which we have found quite rare when collaborating or doing pop ups with other brands. They choose the brands they like to collaborate with and then trust them to deliver. I think this makes it even more interesting for the customers as they never know what it’s going to look like next! 

PH: What do you believe are the benefits of collaborating with like minded brands? 

Stef (MM): Like minded brands have like minded customers and by collaborating with them we extend our customer base and reach out to other customers that are much more likely to buy into Meri Meri.  They may not have even heard of us before but by collaborating with other brands they may follow / like it gets us in front of them as well and gets our name out there.

Maria (MM): Creative collaboration with other brands is always exciting for us as it gives us an opportunity to develop ideas and ranges that might not fit into the exact handwriting of the Meri Meri brand, but do work as a collaboration and bring another dimension to it.  

Victoria (TH): It's a way for us to reinvent the space every few months. It gives us something fresh to communicate with our customers. It's usually fun to organise and I hope it shows that we can look beyond our four walls and shake up The Hambledon aesthetic. I don't want the shop to feel too precious.

PH: Finally, Meri Meri also did a wonderful collaboration with Liberty. Do you have any tips or advise for small independent designers and brands on how to go about collaborating with influential brands? 

Stef (MM): Keep at it.  It is hard work to get your foot in the door but once you do it is worth all the work.  Collaborating with influential brands is a great way to get exposure and catch the eye of potential customers.  It also keeps your designs fresh and on trend.

Maria (MM): Be prepared and well planned. Think of it as a partnership. If you're drawn to a particular brand, think about what it is specifically about that brand that your drawn to and what it is about your brand that you feel compliments theirs and work from that. 

Thanks for that insight ladies! Isn't it just a gorgeous space filled with gorgeousness!? I definitely think a day trip to Winchester is on the cards! If you can't make it there though, you can check out the Meri Meri range over on The Hambledon's website